
Congratulations on your new CarCave foldable carport! This guide walks you through unboxing, assembling the frame, fitting the tarpaulin cover, and securing your CarCave to the ground. Read the whole guide once before you start – it only takes a few minutes and will save you time on site.
Approx. 30-45 minutes with two people
Two people for this installation, especially for lifting the frame and tarpaulin into place
Do NOT use a knife, box cutter, or any bladed tool to open your CarCave box or cut away the packaging.
The tarpaulin cover, straps, and Velcro fastenings are folded tightly against the cardboard and plastic wrap, and a blade can very easily slice through the fabric before you realise it’s there. A single cut in the tarpaulin cannot be undone and is not covered under warranty.
Please instead:
If you’re at all unsure where the fabric sits inside the packaging, unwrap it slowly by hand from one end rather than cutting blind.
Lay both parcels out on a clean, flat, open area (driveway or garage floor) before you begin. Check off all pieces against your packing list before disposing of any packaging, in case you need to identify a part later.
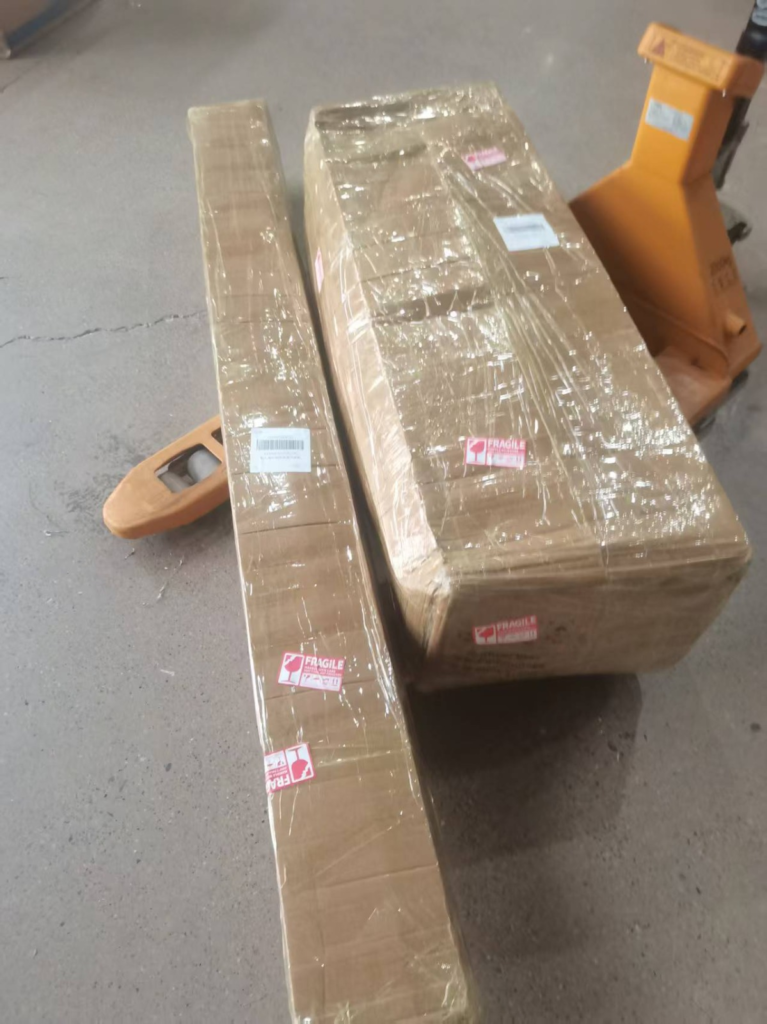
Unfold the tarpaulin cover fully on the ground with the silver-coated side facing up. Find the fabric panel marked "Back" - this marks the rear of the carport and tells you which way the frame needs to feed through.
Unbundle the frame poles and lay them out. Each pole is marked with a number near its end - these numbers show you the assembly order and which curved bends pair with which straight sections. Group the matching numbered pieces together before joining anything.
Working from the lowest number up, slot each straight pole into its matching curved bend, following the numbers marked on each piece. Push each joint fully home so the poles sit flush.
Once your first pole run is assembled, feed it through the tarpaulin starting at the "Back" marked opening. Guide the pole through the fabric sleeve until it comes out the other side.
Repeat this for each numbered pole run, feeding each one through its matching sleeve in the tarpaulin, working from one end of the carport to the other.
Continue assembling and threading the remaining numbered poles the same way as Steps 3-4, until every pole run has been built and fed through its tarpaulin sleeve.
While you're working, it helps to loosely gather and tie off the free ends of the poles you've already fed through, so they don't slide back out of the fabric while you continue with the rest of the frame.
With all poles connected and threaded through the tarpaulin, lift the structure upright. With a second person holding one end, walk the frame up into its arched shape. Adjust the poles and fabric so the tarpaulin sits evenly over the frame with no twists, and the "Back" panel is at the rear.
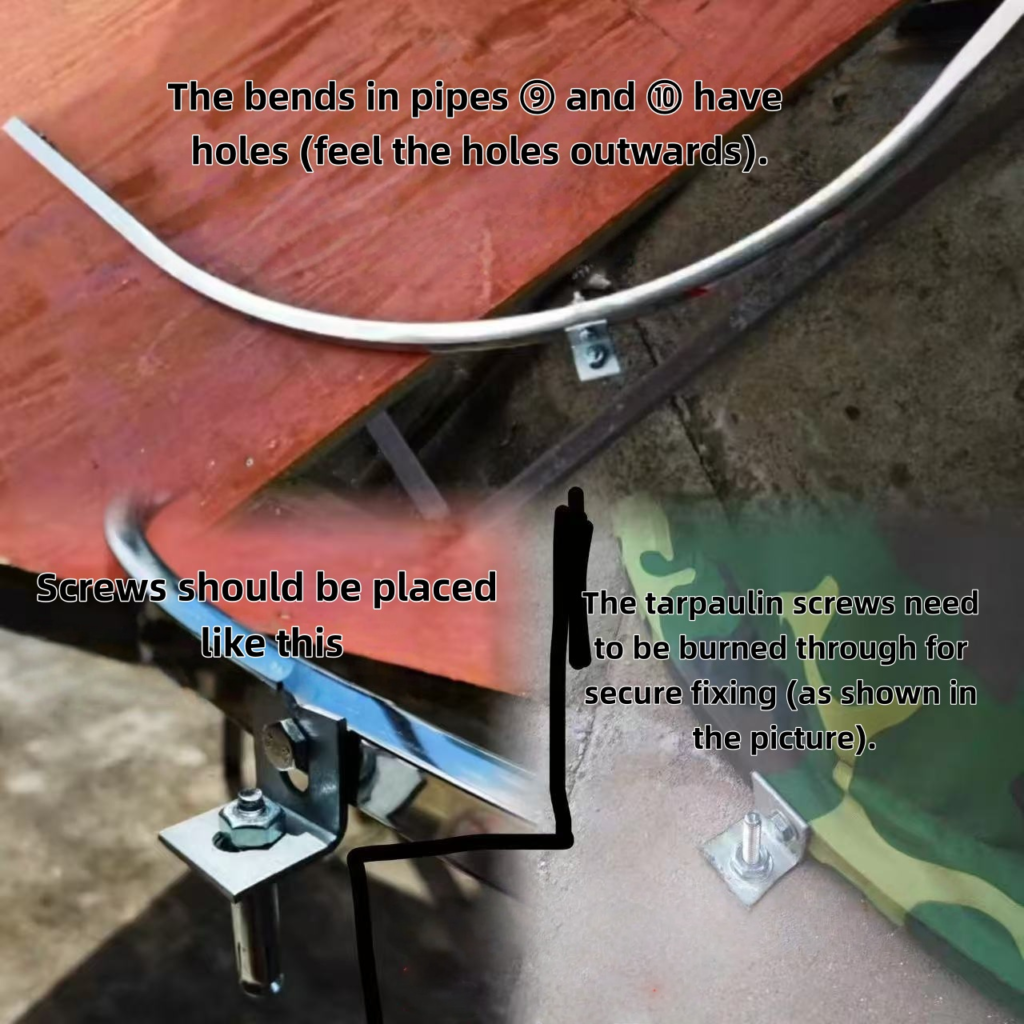
Work along each side of the frame, checking that every bracket is firmly screwed before moving to the next.
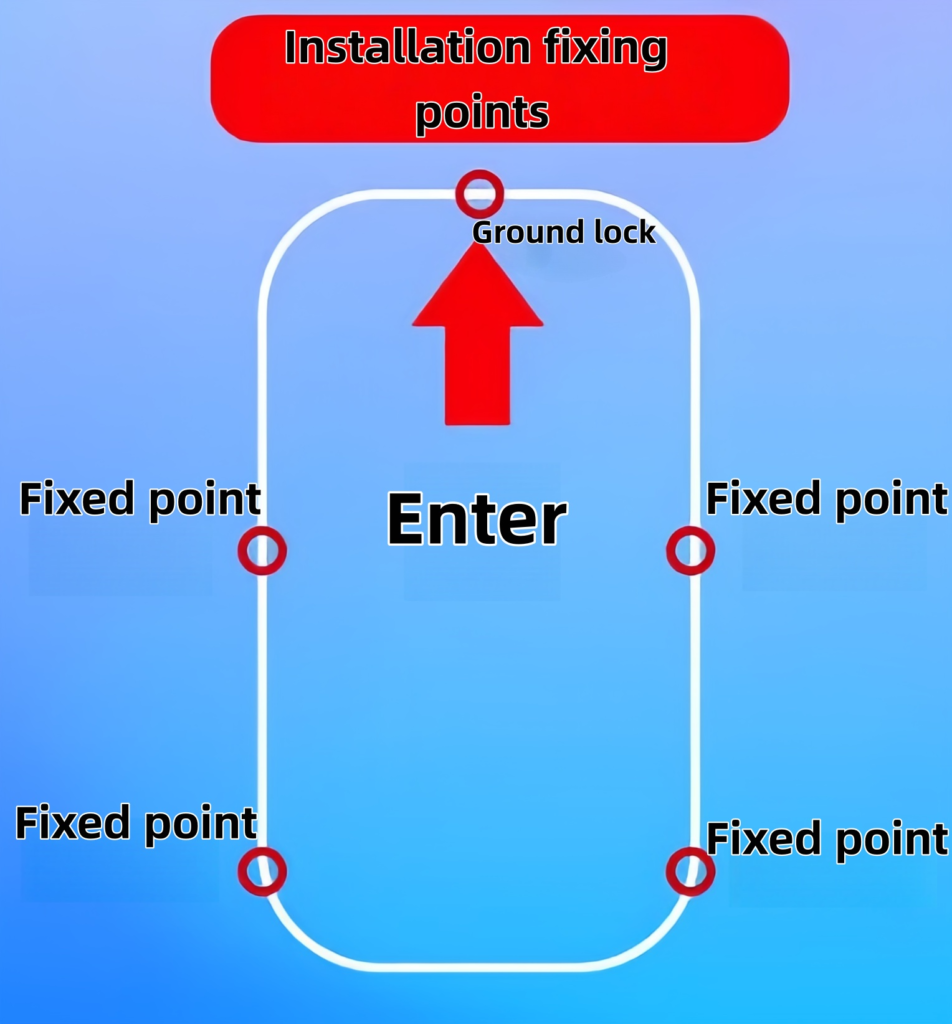
Peg or bolt down all 5 points using the anchors provided, starting with the two rear fixed points, then the two front fixed points, and finishing with the centre ground lock at the entry. Pulling each fixing taut as you go will help square up the frame and remove any slack in the tarpaulin.
Note: If you’re installing on concrete or pavers rather than soil, use the masonry anchors (if supplied) or securing method suited to your surface instead of ground stakes.
For care and maintenance tips, or if you have any questions about your installation, get in touch with the ShadeKits team – we’re happy to help.