
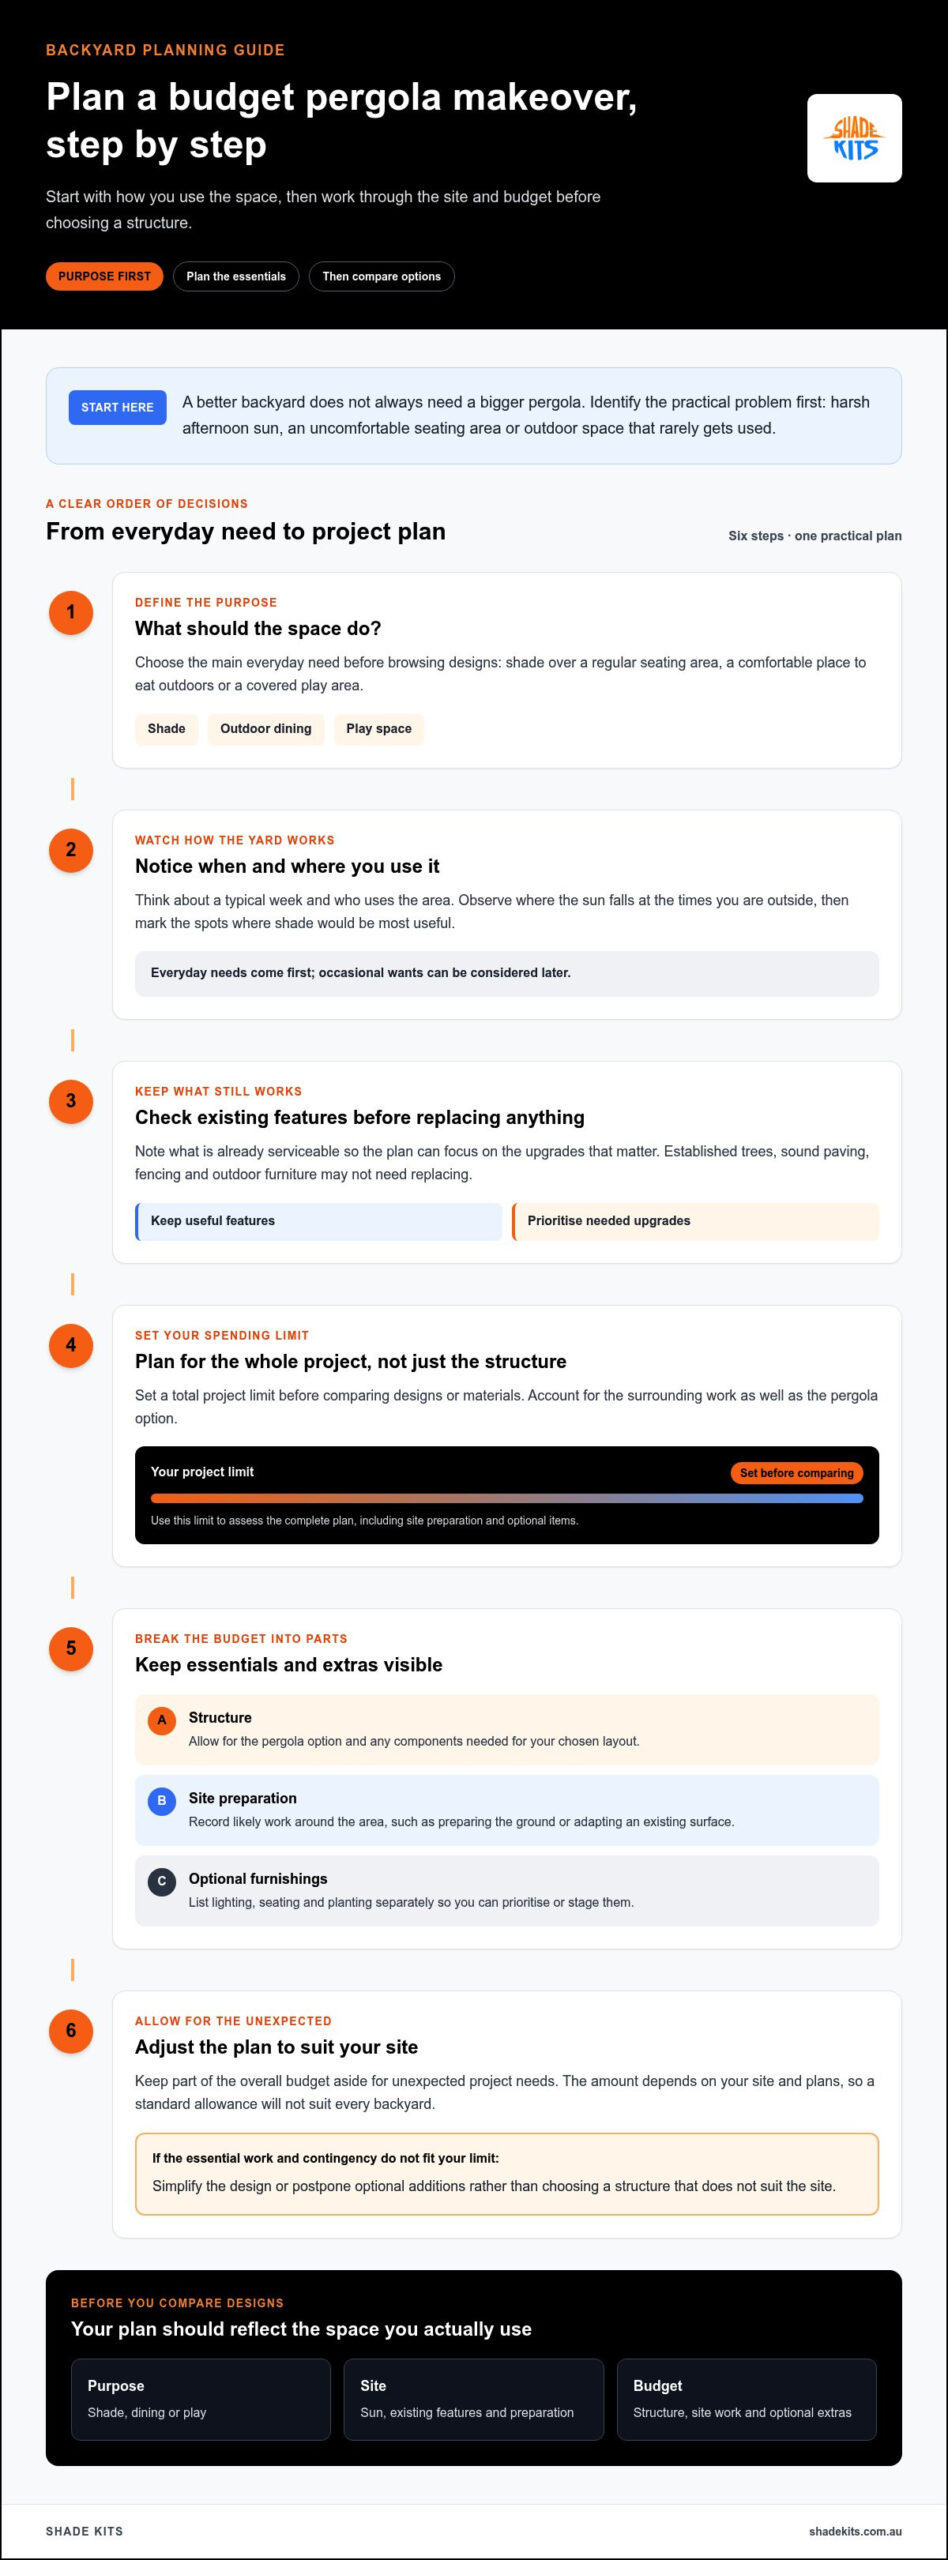
A better backyard doesn’t always need a bigger pergola. Start by solving the practical problem: harsh afternoon sun, an uncomfortable seating area or outdoor space that rarely gets used. The most useful budget pergola ideas australia homeowners can put into practice begin with a clear purpose for the space.
Before spending, decide how you’ll use the area, what existing features can stay and which upgrades matter most. Then compare designs, materials and DIY requirements against your budget and the conditions of your site.
This guide covers practical ways to improve outdoor shade and comfort, compare materials and plan a DIY pergola project. It also explains what to consider before building, including site preparation and local approval requirements, so you can make informed decisions before buying materials or starting work.
A budget-conscious pergola makeover starts with a practical need, not a decorative finish. Decide what the space should do, then choose a structure and add finishing touches only if they fit your priorities. This turns budget pergola ideas australia into a plan shaped around your household, rather than a look copied from a picture.
A pergola can define an outdoor living area, but its design needs to suit its purpose and setting. For a concise overview of common features and background, see What is a Pergola? Before browsing designs, make a simple priority list:
This list helps you make trade-offs. You don’t need every feature at the start. Use the space for a while before deciding whether optional additions would make it more useful.
Think about a typical week. When do you use the yard, and who uses it? If someone sits outside most afternoons, shade over that seat may matter more than extra room for occasional entertaining. If outdoor meals are a regular part of family life, make space for a dining area. A play area may need clear floor space as well as cover.
Separate everyday needs from occasional wants, then note what already works. Established trees, sound paving, fencing and outdoor furniture may not need replacing. Observe where the sun falls at the times you use the area, and mark the spots where shade would be most useful. This gives you a practical starting point for deciding where the structure should go.
Set a total project limit before comparing designs or materials. It helps you assess the whole job, rather than spending the budget on the structure before accounting for the surrounding work. Divide your plan into three categories:
Keep some of your overall budget aside for unexpected project needs. The amount will depend on your site and plans, so a standard allowance won’t suit every backyard. If the essential work and a contingency don’t fit your limit, simplify the design or postpone optional additions rather than choosing a structure that doesn’t suit the site.
Once you know what the space needs to do, compare options by more than appearance. The right balance depends on when you need shade, what’s already in place and how much work you’re comfortable doing yourself. A simpler plan may be easier to organise, but it won’t necessarily reduce the total project cost. Site preparation and other project needs still count.
| Priority | What to consider | DIY and extras |
|---|---|---|
| Shade for a regular seating area | Note when sun reaches the seating and how exposed the area is. | Keep the layout focused; add lighting or extra seating later if needed. |
| Outdoor dining | Allow for the table, chairs and room to move around them. | Check that the structure and any roof suit the intended use. |
| A play area | Consider the clear space children need and what’s around it. | Prioritise a practical layout before decorative additions. |
| A transition beside the home | Record nearby walls, doors, paving and access routes. | Assess the site and assembly demands before choosing a design. |
Start with the hours you use the area and its exposure to sun and weather. Roofing is a functional choice, not just a colour decision. Consider the kind of cover you want and how it suits the space’s everyday purpose. Shade Kits pergola kits feature aluminium frames and UV-resistant polycarbonate roofing. Compare roofing materials against your needs rather than assuming one option suits every backyard.
For further context, look up pergola roofing options in a dedicated Australian roofing guide before settling on a material. Keep your decision grounded in the site and intended use. Avoid relying on broad claims about temperature or performance in particular conditions.
A kit can suit people who want a defined shade structure and are prepared to self-install. Shade Kits supplies DIY pergola kits designed for straightforward assembly, with aluminium frames and UV-resistant polycarbonate roofing. These details give you specific materials to compare, but the kit still needs to suit your site and purpose. Explore aluminium pergola kits as one category when comparing frame materials and assembly approaches.
Be realistic about the work involved. Check what site preparation is needed, allow time for assembly and consider whether you’ll have suitable help. A kit designed for DIY installation still requires planning. To compare self-installed shade structures, browse Shade Kits pergola kits.
Before deciding, compare your shortlist with the site, shade purpose and work you can take on. Choosing fewer features can make the plan easier to organise and leave room to add useful extras later.
A pergola can be the main improvement without triggering a complete backyard overhaul. Separate the structure from add-ons such as lighting, new furniture and planting. Then decide which changes solve a real problem. A staged plan lets you prioritise essential function before optional enhancements.
Look at what already works before adding items to your list. If existing paving provides a stable, usable surface, replacing it may matter less than shading the spot where you sit. Outdoor furniture might need only a clean or a new arrangement. Keeping serviceable features can leave more of your project budget for the upgrade that makes the biggest difference.
Decorative lighting, replacement furniture and extra planting can all improve an outdoor area, but they may not be essential at the start. First check whether the space is comfortable and practical with the shade structure in place. Try rearranging existing chairs or moving a table to its intended position before buying new pieces.
A simple now, next and later list can make trade-offs easier to see:
You don’t need to complete every stage. The list simply helps distinguish what the backyard needs from what would be nice to have.
A pergola is one way to define an outdoor area. An awning or patio cover may suit a different layout or shade need. Think about where you want cover and how the outdoor area connects with the home. You might want a defined place for dining, for example, or shade closer to an existing outdoor opening. The right fit depends on the space and how you plan to use it, not on choosing the most elaborate option.
Compare the footprint and placement of each option with access routes, furniture and the area that needs cover. An awning may suit a shade need closely connected to the home; a patio cover is another option for a covered outdoor area. Explore aluminium awnings for Australian homes as an alternative category, and compare it with a pergola based on the layout rather than appearance alone.
These are the trade-offs behind practical budget pergola ideas australia homeowners can adapt: prioritise function, keep what remains useful and add extras only when they improve the space. If a DIY pergola kit is on your shortlist, explore Shade Kits pergola options as you compare structures for your project.
A clear project sequence turns budget pergola ideas australia homeowners are considering into a layout that fits the actual backyard. Before choosing a final position, record boundaries, access points, existing surfaces and nearby structures. These details affect what fits, how people move through the area and what preparation may be needed.
Work through these steps in order. If an early check changes your plan, adjust the layout before buying materials or scheduling assembly.
Make a simple site sketch and label measurements, boundaries, doors, paths and fixed features. Mark where water drains and note obstacles such as garden beds or established trees. Then observe how you use the area at different times. A dining space may need a different footprint from a shaded seat, and the useful position for cover depends on your site and routine.
Keep the sketch with your design notes. It gives you a reference when comparing layouts and makes it easier to spot access or placement issues before assembly begins.
Approval requirements can vary between councils and across states and territories. Check the rules that apply to your property and design with the relevant council or authority. Don’t rely on a general guide as a final decision. Also assess site-specific structural and weather considerations against applicable requirements and kit instructions, rather than assuming one set of conditions suits every location.
For a DIY build, read the assembly instructions before setting a start date. Confirm you have the tools, a clear work area and suitable help for the planned tasks. If the instructions or site conditions raise questions about structural suitability, resolve them before proceeding.
A careful plan helps you choose a layout that suits both the yard and your capacity to assemble it. If a kit is the right approach for your project, explore DIY pergola kits as you compare your options.
A kit can be a practical route if you want a defined shade structure and are ready to self-install. Match the kit to the job and the site rather than choosing on appearance alone. Use this checklist to compare options and identify questions to resolve before committing.
Compare the kit details and assembly instructions with your intended use and measured space. Check that the proposed layout fits and leaves the access you need. Consider the materials against your project requirements, too. Shade Kits DIY pergola kits feature aluminium frames and UV-resistant polycarbonate roofing, giving you specific frame and roofing materials to assess.
Assess site-specific structural and weather suitability separately from general product comparisons. These details depend on the project and should be considered against relevant requirements rather than assumed from a general description. Check local approval requirements before settling on a design, too.
Break the build into practical tasks. Review the instructions, make a tool list, prepare a clear work area and organise any help you’ll need. Consider access for moving materials into the work area, and choose an assembly time that gives you room to work through the steps without rushing. Even a DIY design intended for straightforward self-installation benefits from preparation.
Keep the first stage focused on the structure and the outdoor area’s essential use. Refresh existing furniture or add new pieces, lighting and planting later, once the core space is ready to use. This staged approach keeps decisions manageable and optional purchases out of the essential project plan.
For readers exploring budget pergola ideas australia, a kit is one option when a defined shade structure suits the brief and self-installation is realistic. Shade Kits supplies DIY pergola kits with Australia-wide delivery. Compare the materials, kit details and instructions with your own project before deciding. Explore Shade Kits pergola options as you refine your shortlist.
A more inviting outdoor area doesn’t need to come together all at once. Turn your priorities into a shortlist: note what the space must do, what you can manage yourself and which upgrades can wait. This gives you a practical reference as you compare options and keeps the structure focused on the job it needs to do.
For a defined shade structure, Shade Kits offers factory-direct DIY pergola kits with aluminium frames and UV-resistant polycarbonate roofing, delivered Australia-wide. Compare the kit details and assembly approach with your plans, then choose a solution that fits your project.
With budget pergola ideas australia homeowners can shape around their own space and priorities, a considered first step makes the rest of the project easier to plan. Explore DIY pergola kits for your backyard and take the next step towards an outdoor area that works for you.
There isn’t one cheapest option for every backyard. Start by identifying the spot that needs shade most, then check whether existing seating or paving can stay. If a paved corner already works for outdoor meals, for example, compare ways to shade that area rather than redesigning the whole yard. Consider the preparation and DIY work each option involves, and leave decorative additions for another stage.
Yes, if your current furniture is safe, comfortable and suited to the space. Check for loose joints, wobbling legs or worn surfaces, then try cleaning the pieces and rearranging them to suit the planned layout. Moving a table away from a walkway, for example, may make the area easier to use. Consider replacement only if the furniture doesn’t meet your needs or fit the space.
It can be, if you’re comfortable following assembly instructions and the project suits your skills. Read the instructions carefully and consider whether you can manage each task with the tools and help available. If you haven’t assembled a similar structure before, take time to understand the sequence and preparation involved. A DIY kit provides a defined assembly process, but it doesn’t replace careful planning.
Possibly, so check before buying or building. Requirements vary between states, territories and local councils, and may depend on features such as the structure’s dimensions, position and roof type. Don’t assume a rule that applies elsewhere covers your property. Contact your local council and review relevant state or territory guidance with details of your proposed design. Check early, while you can still adjust your plans.
Give the area one clear job, such as a quiet spot for a morning coffee or a compact place to eat. Measure furniture before deciding where it goes, and keep a clear route between the house and seating area. A small yard can feel crowded if every corner is filled, so preserve open space and retain features that already work. Add details only when they support the space’s main use.
Start with what the structure must do and where it needs to go. Then consider the available space, preparation needed and whether you can manage the assembly. For budget pergola ideas australia homeowners can tailor to their own plans, ask yourself: if this feature were removed, would the space still serve its main purpose? If so, it may be optional rather than a first priority.
You can often stage a project by completing the essential outdoor area first and leaving suitable extras for later. Decide which features are needed straight away and which are optional, so the initial plan stays focused. Before adding anything to the structure, check the kit instructions and applicable requirements. Don’t assume a later change will suit the design or site without checking its compatibility.