
You can assemble a pergola yourself if you have the right tools, follow the assembly instructions and prepare a stable base. Plan for at least two people and choose a dry, calm day. This pergola installation guide covers the key decisions to make before you begin.
It’s easy to focus on assembling the frame, but the ground and anchoring matter just as much. A pergola needs a level, stable area and fixings suited to its location, whether it’s mounted to a wall or installed on decking or soft ground.
Learn how to prepare the site, assemble and secure the structure, and avoid common anchoring mistakes. We’ll also cover how manuals and guided support can help you through the process, so you can decide whether a DIY build suits your project.
DIY assembly can suit a capable team following the supplied instructions, while professional assembly can suit complex builds or limited time. For boundary placement in NSW, Victoria, Queensland, WA, SA or Tasmania, account for the property’s applicable planning controls and the pergola’s size and position; one setback figure doesn’t apply across every state.
Schedule the build for a dry, calm day and plan for at least two people. A second person can steady components while you align and connect the frame. Set aside uninterrupted time to read the manual, organise parts and complete each stage without rushing. Assembly time varies with site access, ground preparation and pergola design.
Compare self-assembly with professional installation based on your practical skills, available help and the work involved. Professional help may suit a complicated site or a build your team can’t safely manage. Labour costs depend on project scope, access and preparation, rather than a universal rate. Compare any assembly service’s stated tasks with the work your project needs.
Before unpacking components, lay out the manual, parts and specified fixings, then match them against the parts list. Typical tools include a tape measure, level, drill or driver, and the spanners or other tools specified in the instructions. Keep protective equipment and a stable work platform ready for tasks that require them. The exact kit depends on the pergola design and supplied hardware.
Separate frame components from roof materials and group fixings by assembly stage. Check that the drill bits and driver heads suit the fasteners provided, rather than forcing an incorrect tool. Don’t substitute bolts, anchors or brackets based on appearance alone. The manual’s parts list and assembly sequence determine what belongs in the build.
Before assembling the frame, identify whether your design is freestanding or wall-mounted. Follow the matching guide, as support points and connection sequences differ. For a freestanding structure, position and connect components in the order shown. For a wall-mounted design, follow the specified wall connection details as well as the frame steps.
Check each component’s orientation against the diagrams before tightening connections. Keep the frame aligned as you progress, and pause if a hole or fitting doesn’t line up. Don’t alter a component to make it fit. Check the part label and relevant instruction step to resolve the mismatch.
Fit the roof, shade cloth or louvres only after assembling the supporting frame as directed. Use the manual’s specified sequence and fasteners for your cover. Lay out the pieces in order before fixing them to confirm their orientation and alignment as you work.
For adjustable louvres, follow the instructions for connecting and operating the mechanism. Attach shade cloth only at its specified fixing points. Roof panels, cloth and louvres may require different installation methods. Finish by checking that each part is seated and secured as directed.
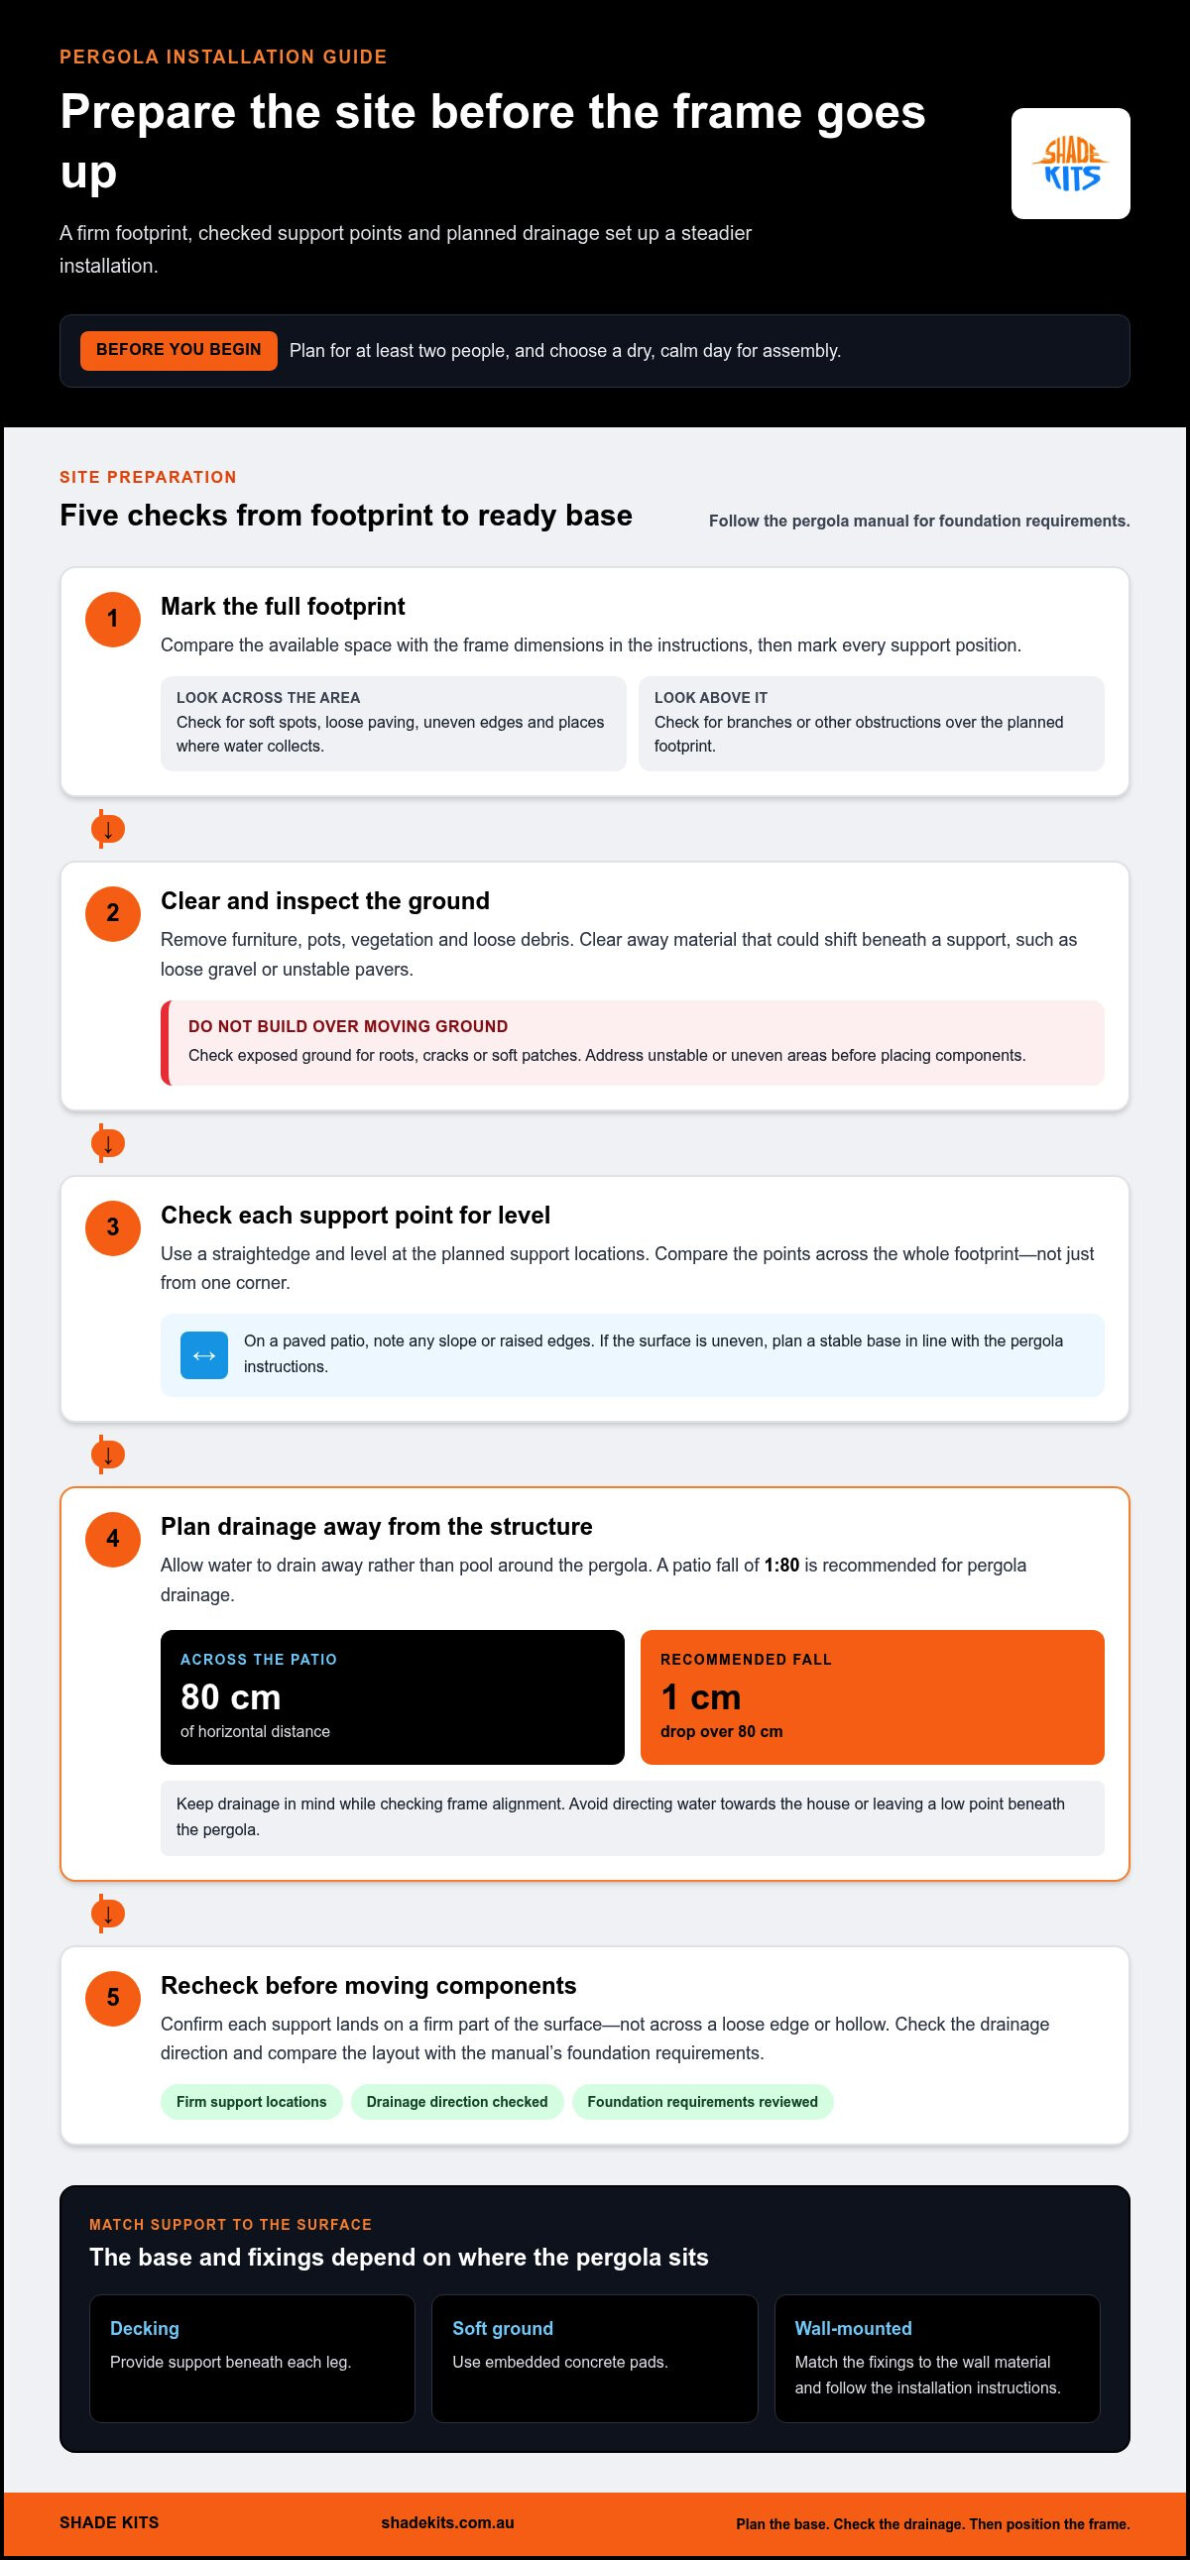
Work through the site preparation before positioning the pergola frame. A stable base and planned drainage help create a suitable surface for installation. Use this pergola installation guide to assess the whole footprint, not just the visible paving.
Common mistakes include choosing unsuitable fixings, misaligning a wall connection and rushing overhead work. Reduce risks by checking the wall, following the assembly sequence and supporting the frame during installation.
Inspect the wall before marking fixing positions. Look for cracks, loose masonry, damaged mortar or surfaces that won’t provide a firm connection. Check the planned frame position against the assembly instructions, including height and alignment. Before drilling, identify the wall material and confirm the fixing method suits it.
Plan how you’ll handle long frame components near the wall. Keep the work area clear, use stable access equipment and avoid reaching beyond a secure position. A helper can steady components while you align them. Stop if the wall surface crumbles, a hole shifts unexpectedly or the frame can’t stay supported. These checks help prevent rushed adjustments and poorly aligned connections.
Match the fixings to the wall material and the pergola’s instructions. For brick walls, the recommended fixings are 8-9 mm steel screws at least 100 mm long, with matching expansion anchors or rawl plugs. Use the specified components as a set. Don’t substitute a shorter screw or mismatched anchor because it appears to fit.
Mark each fixing position using the bracket or assembly guide, then check the marks against the frame layout. Position holes in sound brick, not loose mortar or a damaged edge. Drill to suit the selected anchor and clear dust from each hole before fitting it. If the wall isn’t brick, follow the instructions for that wall type rather than automatically using brick fixings.
Set out the wall bracket positions and check their alignment before drilling. Use a level across the marked line, then compare the marks with the pergola frame. Drill the fixing holes at the required positions and fit the matching anchors. Hold each bracket in place while securing it, keeping the frame support points aligned with the assembly diagrams.
Attach the wall connection in the sequence shown in the manual. Have another person support the frame while you fit the remaining components. Tighten fixings as directed rather than forcing a bolt that resists or sits at an angle. Check the bracket and frame alignment again before adding roof components. If the frame pulls away from the wall or a fixing moves, stop and correct the connection before continuing.
Footing dimensions depend on the surface and support method. The listed concrete footing foundation is 50 x 50 x 60 cm; soft ground calls for 40x40x40 cm concrete pads embedded at least 40 cm.
Match the support plan to the surface throughout installation. Don’t treat a timber deck, composite deck and soil bed as interchangeable anchoring bases. Leg positions determine where the supporting structure or pads must sit.
Keep each leg aligned with its support, then attach it using the pergola’s specified fixings. Fastening into a deck board may not provide the same support as securing the leg above a reinforced joist or concrete pad. If the deck structure doesn’t line up with the leg layout, adjust the support plan before assembly.
Set each pad firmly, then check its position against the frame footprint before fitting the legs. Don’t place pads only at the surface or leave a leg unsupported. A mismatch between pad and leg positions can pull the frame out of alignment during assembly.
Before anchoring, compare the actual surface, footing positions and pergola instructions. Confirm every leg meets its intended support, then secure the structure using the specified method. Recheck frame alignment as you work. If the ground changes between legs, such as where soil meets paving, plan each support point for its own surface.
Use the manual as your project sequence, not just a parts reference. Read it before assembly and follow each step in order.
Make a short checklist from the steps, noting parts that need support or alignment. This gives your team a shared reference and makes it easier to pause safely between stages.
Mark footing locations from the frame layout, then compare them with the manual before digging or setting supports. This helps prevent a mismatch between the base and leg positions.
Don’t guess at a connection or modify a component to bypass an unclear step. Pause the build, compare the part with its diagram and seek guidance on that specific assembly issue.
Before moving on, check that each leg is secured and the frame remains aligned. Note any instruction you followed differently and resolve it before using the structure.
The practical takeaway is simple: use the manual for the exact model, surface and assembly stage. Guided support is most useful when it answers a specific question before uncertainty leads to a faulty connection.
Shade Kits offers Carport Kits for homeowners planning covered vehicle space alongside an outdoor project. For a pergola, explore its Pergola Kits and Patio Covers. Awning Kits offer another shade option for a suitable area.
Use the ground, fixing and assembly considerations in this guide to clarify your project requirements. Then compare the relevant kit type with the space and coverage you want, keeping preparation and anchoring in mind. The right choice depends on the structure you’re planning, not simply on whether it provides shade.
Explore the options for your project at Shade Kits, or visit shadekits.com.au.
Before ordering materials, turn your plans into a simple project brief. Note the intended location, surface type, preferred structure and any questions about access or assembly. This gives you a practical basis for comparing options and identifying what still needs organising. Keep this pergola installation guide handy as you move from planning to choosing a suitable structure.
Explore the product options that fit your outdoor space, then decide how you’ll manage preparation and assembly. Shade Kits offers Carport Kits, Pergola Kits and Awning Kits for different projects. Choose based on the coverage you need, rather than trying to adapt a structure to a space it doesn’t suit.
For help discussing your project and the available options, contact Shade Kits about your pergola project. With a considered plan and the right structure in mind, you can move ahead with confidence.
Plan the layout, prepare the base, assemble the frame, fit the roof, then secure the structure. First, confirm the pergola’s footprint suits the outdoor area and note any nearby doors, windows or drainage points. Sort components by assembly stage, then follow the model-specific instructions. Leave time to complete the anchoring step before using the pergola. If the project involves a wall connection or unusual ground conditions, resolve those details before assembly starts.
Clear the footprint, identify uneven or soft areas, then prepare a stable base suited to the surface. Remove loose material where a support will sit and avoid placing a leg across a cracked paver edge. Use a straightedge and level to compare support locations, not just one part of the site. Consider where rainwater will flow so the prepared area doesn’t create a pooling point beside the house.
Use a fixing method suited to the base and the pergola’s instructions. On concrete, position the post base over the intended fixing point and use compatible anchors specified for the installation. In soil, support the post with a footing designed for the structure and ground conditions. Don’t rely on a surface-level fixing in loose soil. Check that each post is aligned and secured before adding roof components or applying force to the frame.
Permit requirements depend on the pergola design, location and applicable planning and building controls. Before construction, provide your local council or building authority with the proposed dimensions, position, attachment details and roofing type. Ask which approval pathway applies to the project, including any boundary or site restrictions. Keep written approval and final plans with your project records. Don’t assume a small or open-sided structure is automatically exempt.
There isn’t one reliable installation figure for every pergola project. The total depends on the structure, roof type, site access, ground preparation, footing method and whether assembly labour is included. A level paved area and a sloping or soft site involve different preparation. Separate the kit, foundation materials and any installation labour in your project budget, then compare the scope of work included rather than judging options by a single total.