
A patio cover suited to your space and local conditions can help you enjoy your patio rain or shine. Choose by considering the shelter you need, how the structure will be supported and the measurements of your home and patio.
It’s easy to focus on roof material first, but layout matters just as much. A cover that’s too small can leave seating exposed, while a poor fit can complicate planning and installation.
This guide explains how to choose a patio cover, compare DIY kits with aluminium options and plan measurements for shelter from rain and hot weather. You’ll also find practical checks to make before choosing a kit, so you can plan an outdoor space that works for your home.
Start with the patio’s purpose, weather exposure and connection to the house. These details help narrow your design options before you compare materials.
A retractable awning lets you adjust coverage as the sun and weather change. It suits a patio where you sometimes want open sky. However, it won’t provide the same continuous shelter as a fixed roof, and its moving parts need to be considered during planning.
A fixed patio roof provides consistent overhead coverage for furniture, meals and everyday use. It can make the patio feel like a more permanent extension of your home, but limits your ability to open the area to direct sun. Weigh how often you want shade against how often you want an unobstructed view.
For example, a north-facing dining area may need adjustable shade at different times of day. A sheltered seating space used in mixed weather may suit a fixed roof. Before choosing, consider the roof coverage, how it connects to the house and where rain could reach the patio.
In Australia, council approvals and building requirements depend on the proposed cover and its location. The process can vary between states, territories and local councils. The cover’s size, position, connection to the home and site conditions can all affect what applies.
Before committing to a design, identify your local council and describe the planned structure. Check the relevant planning and building requirements for your property, including any site-specific conditions. Don’t assume a small awning and a large attached roof follow the same process.
Keep the proposed dimensions, location and attachment details together as you assess the project. For example, a roof beside a boundary may raise different planning questions from one centred over an existing patio. Clarify the approval pathway before ordering materials or starting construction.
Patio awnings, pergolas and verandahs in Australia don’t have one universal cost. Design and scope determine the main expenses, so compare like with like rather than relying on a broad estimate. Start by recording the planned coverage and how the structure will connect to the house.
Material, roof design and dimensions affect what a project requires. A larger covered area, for example, needs more materials than a compact seating zone. Site access, existing surfaces, drainage and preparation can also affect the work involved. Include these details when comparing options.
Separate the structure from related project tasks when reviewing a quote. Note whether it includes preparation, delivery, assembly and any required approval work. Then compare the same coverage and inclusions across options. This gives you a clearer basis for weighing an awning against a pergola or verandah.
A DIY patio roofing kit can simplify planning by grouping components for a particular structure. Before choosing one, compare its listed contents with your patio measurements and intended use. A kit designed for a freestanding layout may not suit a roof attached to the house. The product description and assembly instructions help explain what the project involves.
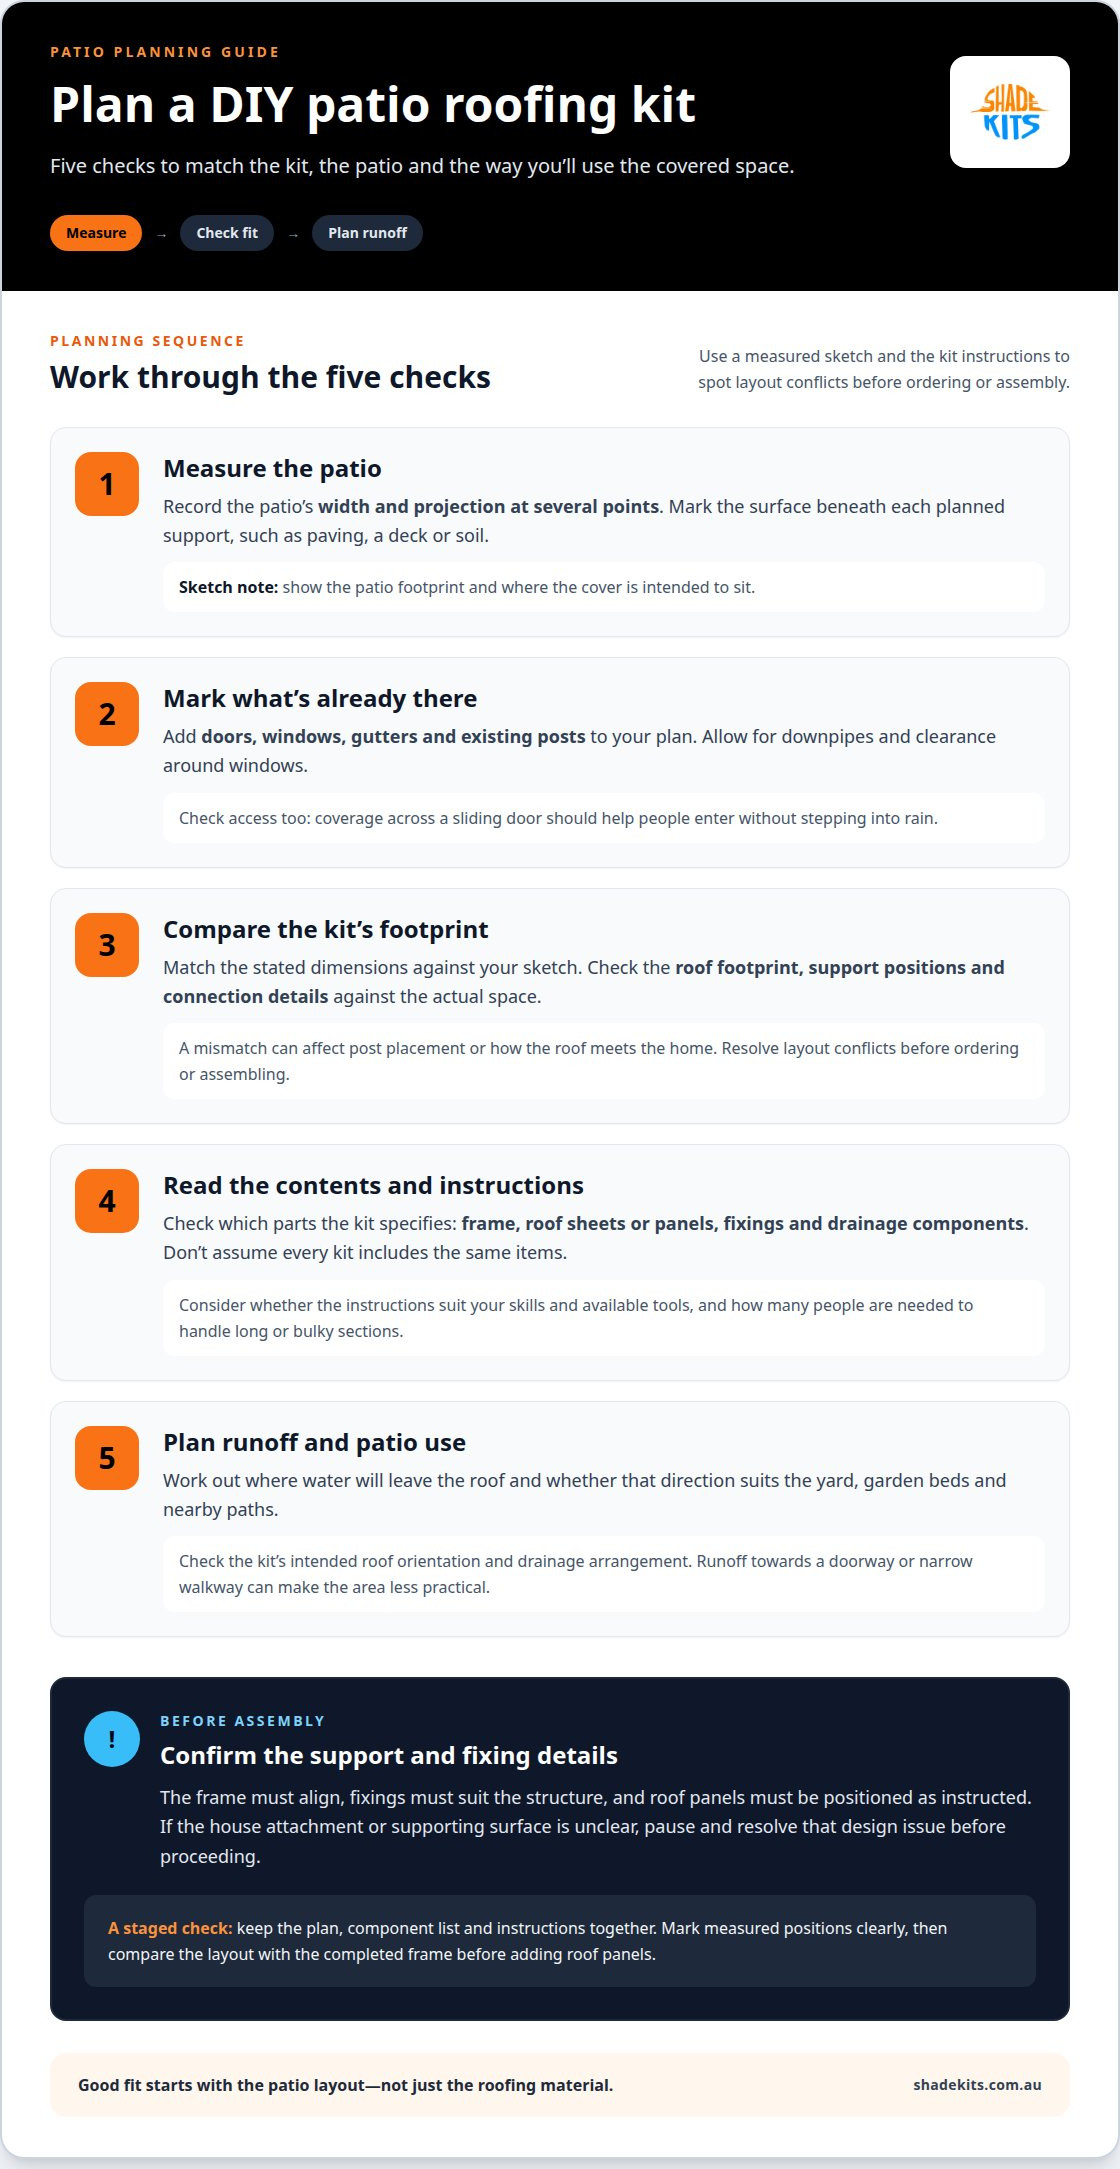
Start with a measured sketch. Record the patio’s width and projection, then mark doors, windows, gutters and existing posts. For example, a roof extending across a sliding door needs enough coverage for people to enter without stepping into rain. Note the surface beneath each planned support, since paving, a deck and soil have different fixing requirements.
Next, compare the kit’s dimensions with your sketch. Check the roof footprint, support positions and connection details against the actual space. Allow for gutters, downpipes and clearance around windows. Even a small mismatch can affect post placement or how the roof meets the home, so resolve layout conflicts before ordering or assembling.
Read the component list and instructions before selecting materials. Look for the frame, roof sheets or panels, fixings and drainage components specified for that kit. Don’t assume every kit includes the same parts. Consider whether the instructions suit your skills and available tools, and how many people are needed to handle long or bulky sections.
Use this sequence to organise the planning stage:
Plan drainage before assembly. Consider where water will leave the roof and whether that direction suits the yard, garden beds and nearby paths. For instance, directing runoff towards a doorway or narrow walkway can make the covered area less practical. Check the kit instructions for the intended roof orientation and drainage arrangement.
DIY work also involves more than connecting parts. The frame must align, fixings must suit the structure, and roof panels must be positioned as instructed. If the house attachment or supporting surface is unclear, pause and resolve that specific design issue before proceeding. A patio cover project is a poor fit for a DIY approach if its structural demands exceed your skills.
Finally, keep the plan, component list and instructions together during assembly. Mark each measured position clearly, then compare the layout with the completed frame before adding roof panels. This staged approach helps you spot mismatched dimensions early, while adjustments are still manageable.
Plan the roof, drainage and airflow together to suit how you use the patio. To reduce mould, pooling and storm damage, keep drainage paths clear, dry damp surfaces and inspect fixings after severe weather.
Choose a cover based on the patio’s exposure and daily use. A solid roof offers continuous overhead shelter, while an open pergola creates a different balance of shade and sky. Consider how each design handles the sun’s path, wind exposure and rain entering from the sides.
For an outdoor kitchen, grill or fireplace, a pergola or pavilion can provide shade and shelter. Plan the cooking area around the structure and its open sides. The cover should suit the location of seating, doors and walkways, rather than simply matching the patio’s outline.
Hot weather also affects comfort beneath a roof. Observe where afternoon sun reaches the patio, then position seating where the cover provides useful shade. If rain protection matters, consider how wind may carry rain beneath an open-sided structure. The roof’s footprint alone won’t show how sheltered the seating will feel.
Pooling water often points to a blocked drainage route or an unsuitable fall. Clear leaves from gutters and outlets, then look for water collecting near posts, walls or paving after rain. Direct runoff away from doors and seating, and avoid letting it wash across a path.
Mould is more likely to linger where dampness and poor airflow persist. Move furniture away from wet walls, dry cushions before storing them, and clear leaves from corners. For example, a mat left against a shaded wall can trap moisture; lifting it helps the surface dry.
Prepare for storms with a visual inspection. Look for loose fixings, damaged roof panels and branches that could fall onto the patio. Secure or store lightweight furniture and remove objects that could blow around. After strong winds, check the structure again and address visible damage before using the space.
Use a simple maintenance routine to spot issues early:
For a covered cooking space, keep the grill and countertop layout practical for daily use. A small fridge can complete the setup, while clear access helps people move between the house and patio. Position a fireplace according to its design and the surrounding structure. Keep an open-air wood-burning fire pit outside, not beneath a pergola or another structure.
For cooler days, choose soft, warm outdoor furniture with pillows and blankets. A mobile space heater can warm a small outdoor seating area; lanterns and string lights add a cosy atmosphere. For an indoor-outdoor space, consider heating and insulated flooring. Growing plants from seed packets can cost less than buying mature plants.
Conditions vary across coastal, inland and sheltered suburban sites in Australia. Choose a patio design for the exposure at your home, not a general idea of Australian weather. A house facing strong afternoon sun has different priorities from one where wind-driven rain reaches the outdoor table.
Observe the patio at different times of day. Note where direct sun lands, which direction rain approaches from and whether neighbouring walls block airflow. For example, a west-facing seating area may need shade during late-day use, while an open yard may need better protection from rain entering sideways.
A solid-roof patio cover suits homeowners seeking continuous overhead shelter. It can make an outdoor dining area more usable in rain, but the roof alone won’t protect every side. Check how it meets the home, where runoff will travel and whether the covered area will remain comfortable in warm weather.
A pergola offers a different balance. Its open structure can provide shade while retaining an airy feel, making it worth considering for a garden seating area. A pergola or pavilion can also shelter an outdoor kitchen, grill or fireplace. Keep a wood-burning fire pit in the open air, not beneath a pergola or another structure.
Choose materials to suit the site and the structure’s intended use. Aluminium is one option for a patio roof or frame. Consider the finish, panel arrangement, support layout and care instructions as a complete system. A material label alone won’t tell you how the finished cover will suit your home.
Use this practical comparison before choosing a design:
Finally, match the cover’s footprint to how people use the patio. A dining table needs space for chairs to move, while a lounge area needs shelter beyond the cushions. Mark furniture positions on a sketch, then compare the usable shaded area with the roof dimensions. This helps show whether the cover suits both the site and your daily routine.
For an Australian home, the best fit balances sun, rain, airflow and layout. Compare these factors before deciding between a solid patio cover, pergola or aluminium option.
A Rain or Shine Patio Covers customer said construction began as scheduled, finished on time and left the site clean. When comparing designs, homeowners can also ask how work will be scheduled and what condition the area will be left in after installation.
A Rain or Shine Patio Covers customer said the patio cover made the space cooler in hot weather and usable during rain. That experience illustrates the day-to-day benefits a cover may offer, while each home’s exposure and layout still guide the choice.
There isn’t one useful cost figure for every Australian patio awning, pergola or verandah. The total depends on the design, materials, dimensions and work needed at the home. Compare the same coverage and inclusions across options. A small awning over a doorway and a roofed verandah across an outdoor dining area are different projects.
For an awning, start with the area it needs to shade and how it operates. A retractable design has moving parts, while a fixed awning stays in position. The material, frame and mounting arrangement affect the project requirements. For example, covering a narrow window differs from shading a wider seating area.
A pergola’s cost depends on its footprint, frame and roof arrangement. An open design and one with more roof coverage need different components. Consider whether you need shade alone or greater protection from rain. A pergola beside an outdoor kitchen may have different layout requirements from one covering a garden bench.
A verandah typically covers a broader area connected to the home. Its dimensions, roof design, support layout and connection details shape the project scope. Existing paving, a deck or uneven ground can also affect preparation. Describe these site conditions clearly when comparing plans or quotes.
Separate the main structure from related project costs. Check whether each estimate includes materials, delivery, preparation, assembly and drainage components. Approval work may also affect the overall budget, depending on the project. Different inclusions can make one option appear cheaper without showing the full scope.
Use a like-for-like comparison:
Then test the proposed size against how you’ll use the patio. Mark the table, chairs and walking route on a sketch. A cover extending beyond the table may improve shelter, but also changes the structure’s footprint and material needs. This simple plan keeps comparisons grounded in the space you’ll use.
For a DIY project, distinguish kit components from tools, site preparation and assembly requirements. For a built project, compare the described scope rather than the headline figure alone. Either way, ask what each estimate includes and how the design fits your measured patio. Clear dimensions and consistent inclusions make budget decisions more meaningful.
Shade Kits offers patio shelter options for different homes and layouts. If outdoor shade is your priority, explore its Pergola Kits and Patio Covers. For a separate vehicle shelter project, Carport Kits may better suit the space and purpose.
Use your measurements and intended use to narrow the choice. Note whether you want cover over seating, an outdoor dining area or a vehicle. This helps you focus on the structure that fits your plans rather than comparing unrelated options.
For a patio project, consider Shade Kits’ patio-cover options alongside the layout and weather exposure you’ve assessed. Contact Shade Kits to discuss which option best fits your project.
A well-planned cover can help you enjoy your patio rain or shine, but it’s most useful when it fits your daily routine. Picture where you’ll sit, eat or entertain, then let that guide your final design choices. A practical outdoor space should feel connected to your home, not like an afterthought.
Shade Kits offers Pergola Kits, Awning Kits and Carport Kits for different shelter needs. Consider which option suits the area you want to improve, then bring your measurements and intended use to the next conversation.
Discuss your patio project with Shade Kits and take the next step towards a more usable outdoor space.
Combine a sheltered seating area with flexible details for changing weather. To enjoy your patio rain or shine, keep everyday furniture beneath the roof and use movable chairs near the edge on fine days. Store cushions indoors when rain threatens, then add lanterns or string lights for evening use. A side table for drinks and a clear route back inside make the space easier to enjoy in either condition.
Block direct sun where you sit while keeping the space open to airflow. Track the afternoon sun across the patio, then position a table or lounge in the covered area it reaches least. A pergola can provide shade while maintaining an open feel. Potted plants can soften exposed edges, and light-coloured outdoor furnishings create a visually lighter setting. Keep walkways clear so air and people can move through comfortably.
Match roof coverage and open sides to the direction weather reaches your patio. Wind-driven rain can enter beneath a roof, so consider screens or sheltered furniture placement along exposed edges. Keep roof panels, connections and supporting posts in good condition, and secure loose outdoor items before unsettled weather. Allow enough airflow for damp areas to dry, rather than enclosing the patio so tightly that moisture lingers.