
Why pay a premium for a custom-built extension when your home’s existing structure is already doing half the work? Most homeowners looking for attached carport kits Australia want to protect their vehicles from intense UV levels and sudden hail, but the prospect of navigating complex council permits and high contractor quotes often stalls the project. It’s common to worry about whether a DIY build will look professional or if the materials can truly withstand coastal rust and the summer heat.
The good news is that you don’t need a trade background to achieve a high-end result. You can professionally extend your home’s protection using durable aluminium frames and UV-resistant roofing designed specifically for our climate. This guide acts as your expert mentor, promising to turn a daunting task into a manageable weekend project that adds genuine value to your property without the stress of hidden costs.
We’ll explore the latest 2026 building regulations, break down the logistics of site preparation, and provide a clear roadmap for a successful assembly. You’ll learn how to bypass middleman markups and gain the confidence to install a structure that looks like it was always part of your home’s original design.
An attached carport kit is a structural extension designed to be fixed directly to an existing masonry wall, timber stud, or roof fascia. While a traditional Carport stands independently on four or more posts, an attached model leverages your home’s existing strength for half of its support. This creates a robust, integrated shelter that functions as a natural extension of your architecture rather than a separate shed. In the Australian climate, where intense UV and sudden storms are the norm, these structures provide essential vehicle protection while maintaining a compact footprint.
By 2026, building regulations for residential structures have become more specific regarding attachment methods, making it vital to choose a kit engineered for structural synergy. Choosing attached carport kits Australia allows you to utilise your home’s foundation, which significantly reduces the amount of ground work and concrete footings required. It’s a pragmatic choice for homeowners who want professional results without the logistical headache of a full-scale construction project.
Suburban blocks are becoming increasingly narrow, leaving little room for bulky, standalone structures. Attached designs solve this by eliminating the need for support posts on the side nearest the house. This design choice provides several practical benefits for daily use:
Deciding between an attached or freestanding structure often comes down to your property’s layout and boundary setbacks. Attached kits are frequently the only viable solution when you need to maintain a specific distance from a neighbouring fence line. Because they require fewer materials and less labour for footing excavation, they are typically more cost-efficient than freestanding alternatives. You’re effectively getting a high-end shelter for a lower total investment.
You’ll need to assess your wall height and ground clearance before starting. A successful attachment requires a solid mounting point, such as a structural wall or a reinforced roof fascia. If your home has low eaves or limited wall space, you might consider a freestanding carport instead. However, for most modern Australian homes, the attached kit offers a streamlined, professional finish that maximises both property value and usable space.
Selecting the right materials for attached carport kits Australia is a decision that balances long-term resilience with the practicality of a DIY build. While some competitors push heavy steel components, aluminium frames offer a distinct advantage for homeowners. Aluminium is naturally rust-proof, which is an essential feature for coastal Australian properties where salt spray can lead to rapid corrosion in traditional steel structures. Because it doesn’t require the constant maintenance of galvanised or painted surfaces, it remains a reliable choice for decades.
Weight is a critical factor that often goes overlooked until the delivery truck arrives. Heavy steel beams typically require mechanical lifting equipment or a large crew to install safely. In contrast, aluminium provides a Lightweight framing solution that a two-person team can manage comfortably. This makes the assembly process far more approachable for a weekend project. Despite being lighter, modern kits are engineered to meet N1 and N2 wind ratings, ensuring your vehicle remains protected even during severe weather events.
Aluminium requires zero painting or specialised rust treatment over its entire lifespan. Beyond its durability, its thermal performance is superior in the Australian sun. Aluminium frames don’t retain heat as intensely as dark-coloured steel, helping to keep the area underneath slightly cooler. Most high-quality kits come with a premium powder-coated finish, providing a sleek, modern look that won’t flake or peel over time. If you’re looking for a low-fuss solution, exploring factory-direct carport kits allows you to secure these high-end materials without the markup of a custom builder.
The roofing panels used in 2026 kits are far more advanced than basic plastic sheets. Modern polycarbonate technology blocks up to 99.9% of harmful UV rays while still allowing natural light to filter through. This prevents your driveway from becoming a dark tunnel and protects your car’s paintwork from fading. These panels are also specifically designed for high impact resistance, meaning they can withstand the heavy hail and falling branches common in suburban Australia. You can customise the heat control by choosing different tints; grey or bronze tints are excellent for reducing glare and heat, while clear panels maximise light transmission for south-facing areas.
Planning your structural attachment is the most critical phase of the project. Whether you’re fixing to masonry or timber studs, the integrity of the connection determines the longevity of your shelter. When browsing attached carport kits Australia, you’ll notice two primary mounting styles. The choice depends on your home’s architecture and the required clearance for taller vehicles. You must also account for roof pitch; a minimum of 5 degrees is typically recommended to ensure efficient water runoff, particularly in tropical regions or areas prone to heavy seasonal downpours.
Before you finalise your design, determine the required height for your specific needs. If you’re protecting a 4WD with a roof rack, a caravan, or a boat, you’ll need significantly more vertical clearance than a standard sedan. Measure the highest point of your vehicle, including any antennas or solar panels, and add at least 200mm of buffer space to ensure safe entry and exit without the risk of accidental contact.
Wall mounting provides exceptional structural rigidity by anchoring the kit directly into the home’s load-bearing walls. This usually involves a ledger board, which acts as a bridge to distribute the weight of the kit evenly across multiple timber studs or a wide masonry surface. It’s often the preferred method for single-storey homes with sufficient wall height. One vital detail is sealing the top edge of the attachment point with high-quality silicone or flashing. This simple step prevents water from seeping behind the ledger and into your home’s internal structure, preserving both the house and the new extension.
If your wall height is limited, a fascia-attached design is often the superior choice. This method secures the carport to the roof’s fascia board, effectively raising the overall height of the structure. This provides the necessary clearance for high-roof vans or boats that wouldn’t fit under a standard eave-mounted design. However, you shouldn’t simply screw into the timber or metal fascia alone.
Modern engineering requires a “fascia bracket” that reaches back to the roof rafters, transferring the load directly to the primary house frame. This ensures your gutters remain functional and your roofline stays straight under the weight of the new extension. It’s a sophisticated way to gain extra head-height while maintaining a clean, integrated look that follows the existing lines of your home.
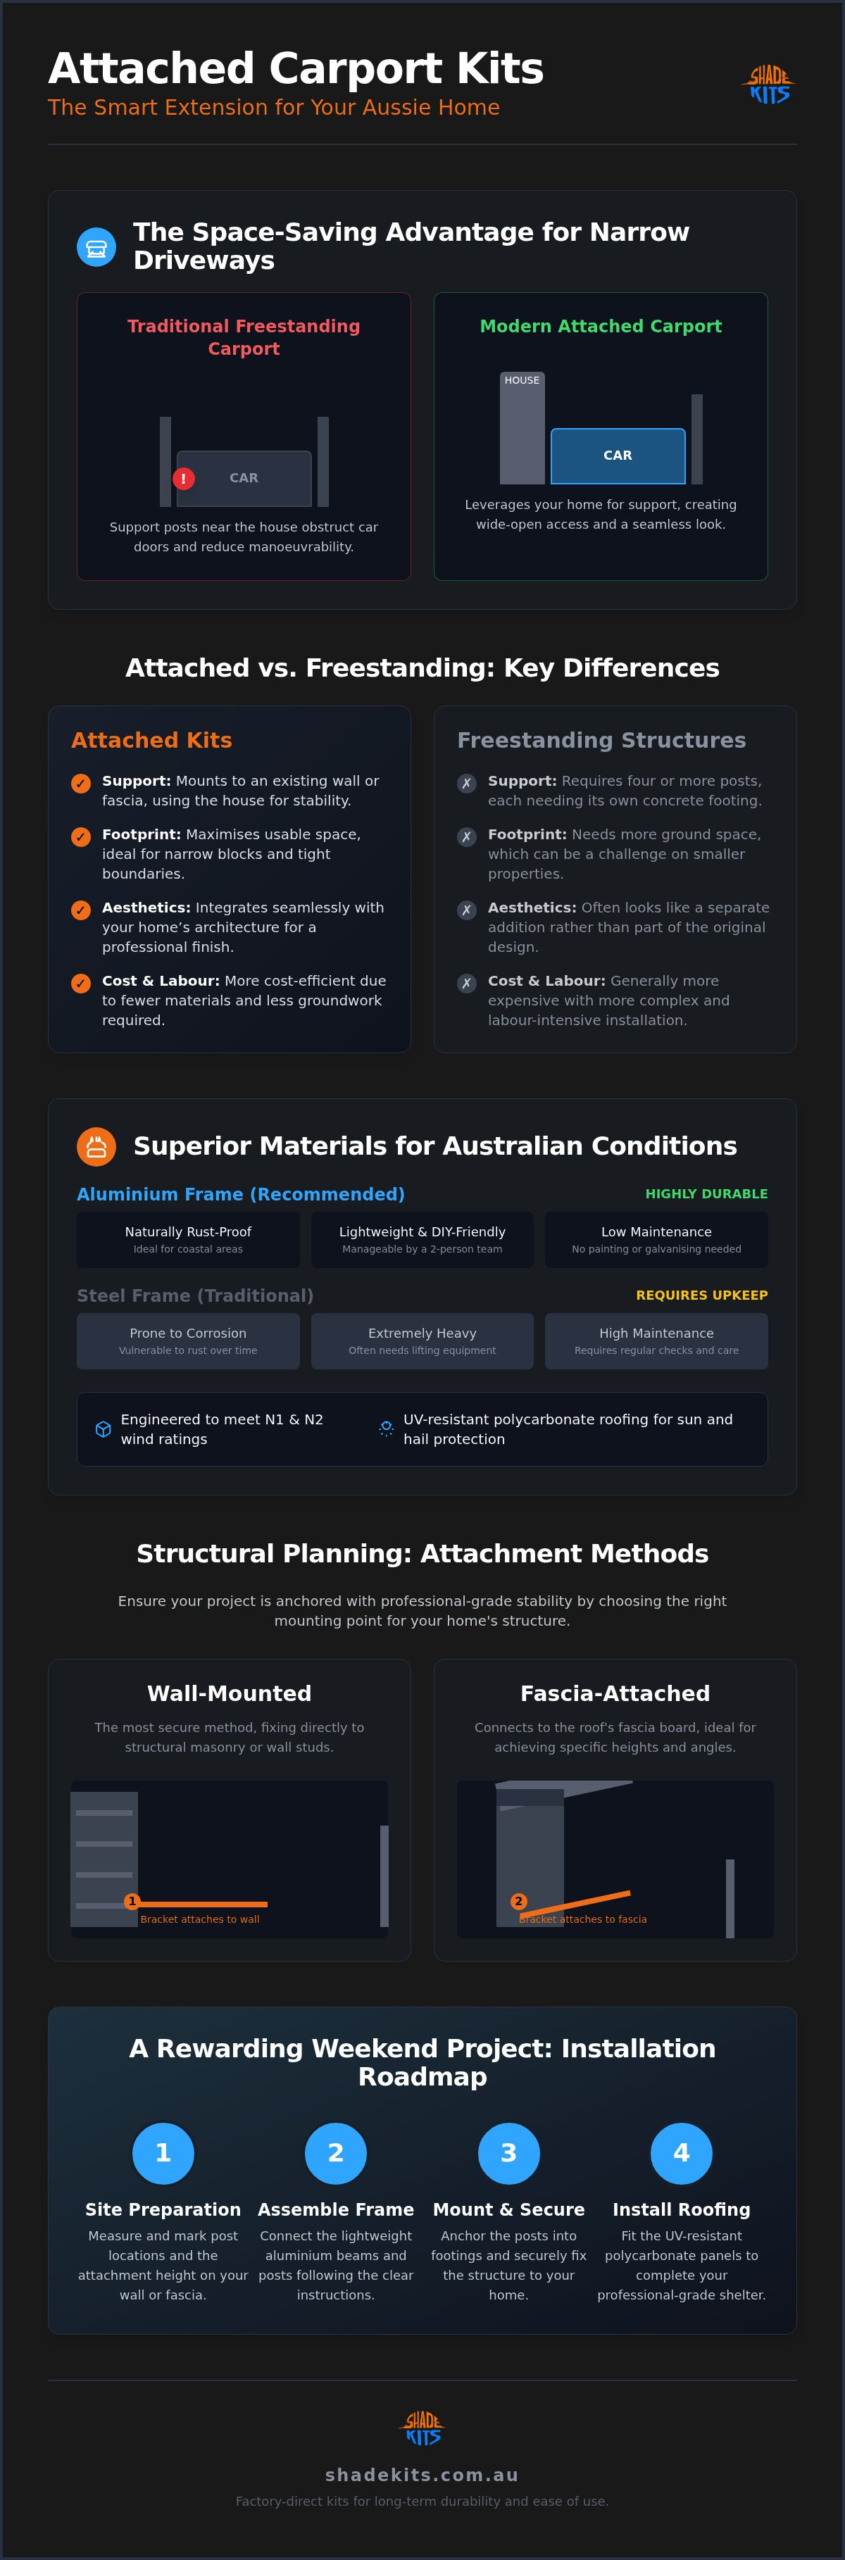
Installing high-quality attached carport kits Australia is a methodical process that rewards patience and precision. Before picking up a drill, you must organise your workspace. Lay out every component and cross-reference them with the inventory list provided in your kit. This prevents the frustration of stopping midway through the build. You’ll need standard tools: a hammer drill, a high-quality spirit level, two sturdy ladders, and a socket set. Having a second pair of hands is essential for lifting the aluminium beams safely into position.
The assembly follows a logical sequence to ensure structural integrity:
Your foundation choice depends on your existing driveway. A “bolt-down” installation is the most popular DIY choice because it utilises an existing reinforced concrete slab, requiring only a hammer drill and heavy-duty anchors. If you’re building on soil, “in-ground” post setting involves digging footings to a specific depth, typically 600mm to 900mm depending on local soil conditions. Precision is key; always double-check your diagonal measurements to ensure the structure is perfectly square before pouring any concrete. Investing in attached carport kits Australia with clear, pre-engineered instructions ensures your foundation matches the structural requirements of the frame.
In 2026, many small residential extensions fall under “exempt development” rules. This means you might not need full planning permission if you stay within specific height and floor area limits. However, regulations vary between local government areas. It’s a professional necessity to check with your council before starting. Choosing a kit with pre-engineered plans makes this process significantly faster, as the structural calculations are already completed for you. Ready to start your project? You can browse our range of DIY carport kits to find a design that fits your property’s requirements.
Shade Kits operates on a factory-direct model that fundamentally changes the cost-to-quality ratio for Australian homeowners. By removing middleman markups, we provide premium aluminium structures at a significantly lower investment point than traditional custom-built extensions. When you order one of our attached carport kits Australia, you aren’t just buying raw materials; you’re receiving a precision-engineered system where every component, from the structural beams to the final screw, is included in the delivery. This comprehensive approach removes the common anxiety of missing parts and allows you to focus entirely on the rewarding process of assembly.
We understand that every property has unique requirements. If a permanent structural attachment isn’t the ideal fit for your current situation, perhaps due to rental agreements or specific boundary restrictions, the CarCave offers a versatile alternative. It provides high-level vehicle protection in a more flexible, non-permanent format. However, for those seeking to permanently increase their property’s value, our attached kits remain the preferred solution for long-term durability and structural resilience.
Our components are designed to fit together seamlessly without the need for specialised machinery or heavy trade equipment. For 2026, our polycarbonate roofing technology has been further refined to manage the extreme UV levels of the Australian sun while resisting the corrosive salt spray found in coastal regions. These materials don’t just protect your car’s paintwork; they enhance your home’s kerb appeal with a sleek, modern aesthetic. The result is a structure that feels like an intentional architectural choice rather than a budget add-on, providing a professional finish you can take pride in.
Achieving the perfect fit for your driveway is a simple task when you use our online planning resources. We’ve demystified the technical side of measuring for attached carport kits Australia so you can accurately determine the clearance required for your specific vehicle, whether it’s a standard sedan or a high-roof 4WD. Once your order is placed, we handle the logistics of Australia-wide delivery, ensuring your kit moves safely from our factory to your front door. You can browse our full range of Carport Kits here to find the design that matches your home’s style and your protection needs.
Extending your home’s protection doesn’t have to be a complex or expensive endeavour. By selecting attached carport kits Australia, you’re choosing a space-saving solution that leverages your existing house structure for maximum stability. We’ve explored how high-grade aluminium and UV-resistant polycarbonate provide the necessary resilience against harsh sun and hail while remaining lightweight enough for a straightforward DIY installation. It’s a pragmatic way to add property value and functional shelter without the middleman markups of custom construction.
With our factory-direct pricing and Australia-wide delivery, you’ll receive a comprehensive kit that includes everything needed for a professional finish. Whether you’re mounting to a brick wall or a roof fascia, the process is designed to be manageable and rewarding. Take the next step toward securing your vehicle and enhancing your outdoor space today.
View Our Range of Durable Attached Carport Kits
You now have the structural knowledge and the installation roadmap to succeed. We’re here to support you throughout your project, ensuring your new carport stands strong for years to come.
Yes, most Australian states classify a carport as a Class 10a building under the National Construction Code, meaning a building permit is typically required. While some smaller structures might fall under “exempt development” rules, these vary significantly between local government areas. It is a professional necessity to consult your local council before starting. Using a kit with pre-engineered plans often simplifies the application process and helps ensure your project meets all safety standards.
It is highly recommended to have a team of at least two people for a safe and successful installation. While the aluminium components are lightweight and manageable, the length of the main beams and rafters makes them awkward for a single person to position and level. Having a second pair of hands ensures that one person can secure the fixings while the other holds the structural members perfectly plumb and square.
A minimum roof pitch of 5 degrees is the industry standard for ensuring effective water runoff and preventing debris build-up. In regions prone to heavy tropical downpours or high rainfall, a slightly steeper pitch may be beneficial to handle the increased water volume. Correct pitching prevents pooling on the polycarbonate panels, which protects the structural integrity of the roof and ensures your integrated gutter system functions exactly as designed.
Modern attached carport kits Australia are engineered to meet specific N1 and N2 wind ratings, making them suitable for most suburban residential areas. The structural synergy created by anchoring the kit directly to your home’s masonry or timber frame provides exceptional stability. By using high-grade aluminium and impact-resistant polycarbonate roofing, these structures are designed to withstand heavy hail and intense wind loads while remaining firmly secured to your existing house foundation.
Aluminium is the superior material for coastal environments because it is naturally rust-proof and highly resistant to salt spray corrosion. Unlike steel, which requires heavy galvanisation or constant paint maintenance to prevent rust in seaside conditions, aluminium remains structural and aesthetically pleasing for decades with minimal care. Its lightweight nature also makes it the more practical choice for DIY teams who want a durable, long-term solution without the handling difficulties of heavy steel.
You can successfully attach a kit to both metal and timber fascias, provided you use specialised fascia brackets. These brackets are designed to reach through the fascia and anchor directly into the roof rafters, which are the true load-bearing members of your home. It is important to remember that the fascia board itself is rarely strong enough to support the weight of a carport, so the connection to the internal rafters is vital for safety.
Minor wall irregularities can be managed by using a structural ledger board combined with high-quality packers to create a level mounting surface. The ledger board acts as a bridge, distributing the load across the wall while providing a straight line for the carport attachment. Once the ledger is secured, any small gaps between the board and the house wall should be sealed with flashing or silicone to prevent water from seeping behind the structure.
A standard installation usually takes two people between one and two days to complete. Most homeowners find they can finish the project over a single weekend if they have organised their tools and inventory beforehand. Day one typically involves marking the attachment point and securing the frame, while day two is dedicated to installing the polycarbonate roofing panels, gutters, and downpipes. This methodical approach ensures a professional finish without feeling rushed through the technical steps.