Correct alignment matters more than force when fitting the bearings and rear bulkhead. These CarCave assembly instructions explain how to position and secure both parts in the sequence shown for your kit.
It can be tempting to attach each component quickly, but first check its orientation and fit. If a part does not sit as expected, do not force it into place. Pause and check the diagram for the correct position before continuing.
This guide walks through the bearing and rear bulkhead stages, from preparing the parts and checking their positions to securing the assembly. You’ll learn what to look for as you work and how these steps fit into the wider CarCave assembly process, helping you move forward methodically and with confidence.
Key Takeaways
- Follow the kit’s assembly sequence when positioning the bearings and rear bulkhead, and avoid forcing parts that don’t fit.
- Use the parts list and instructions to organise the required components and tools before assembly begins.
- Plan the assembly with enough help to handle and position components safely and steadily.
- Prepare a suitable, level site and follow the kit’s anchoring instructions for a secure assembly.
- Allow time for the full process, including site preparation and careful alignment, rather than focusing only on fastening parts.
Rear bulkhead installation
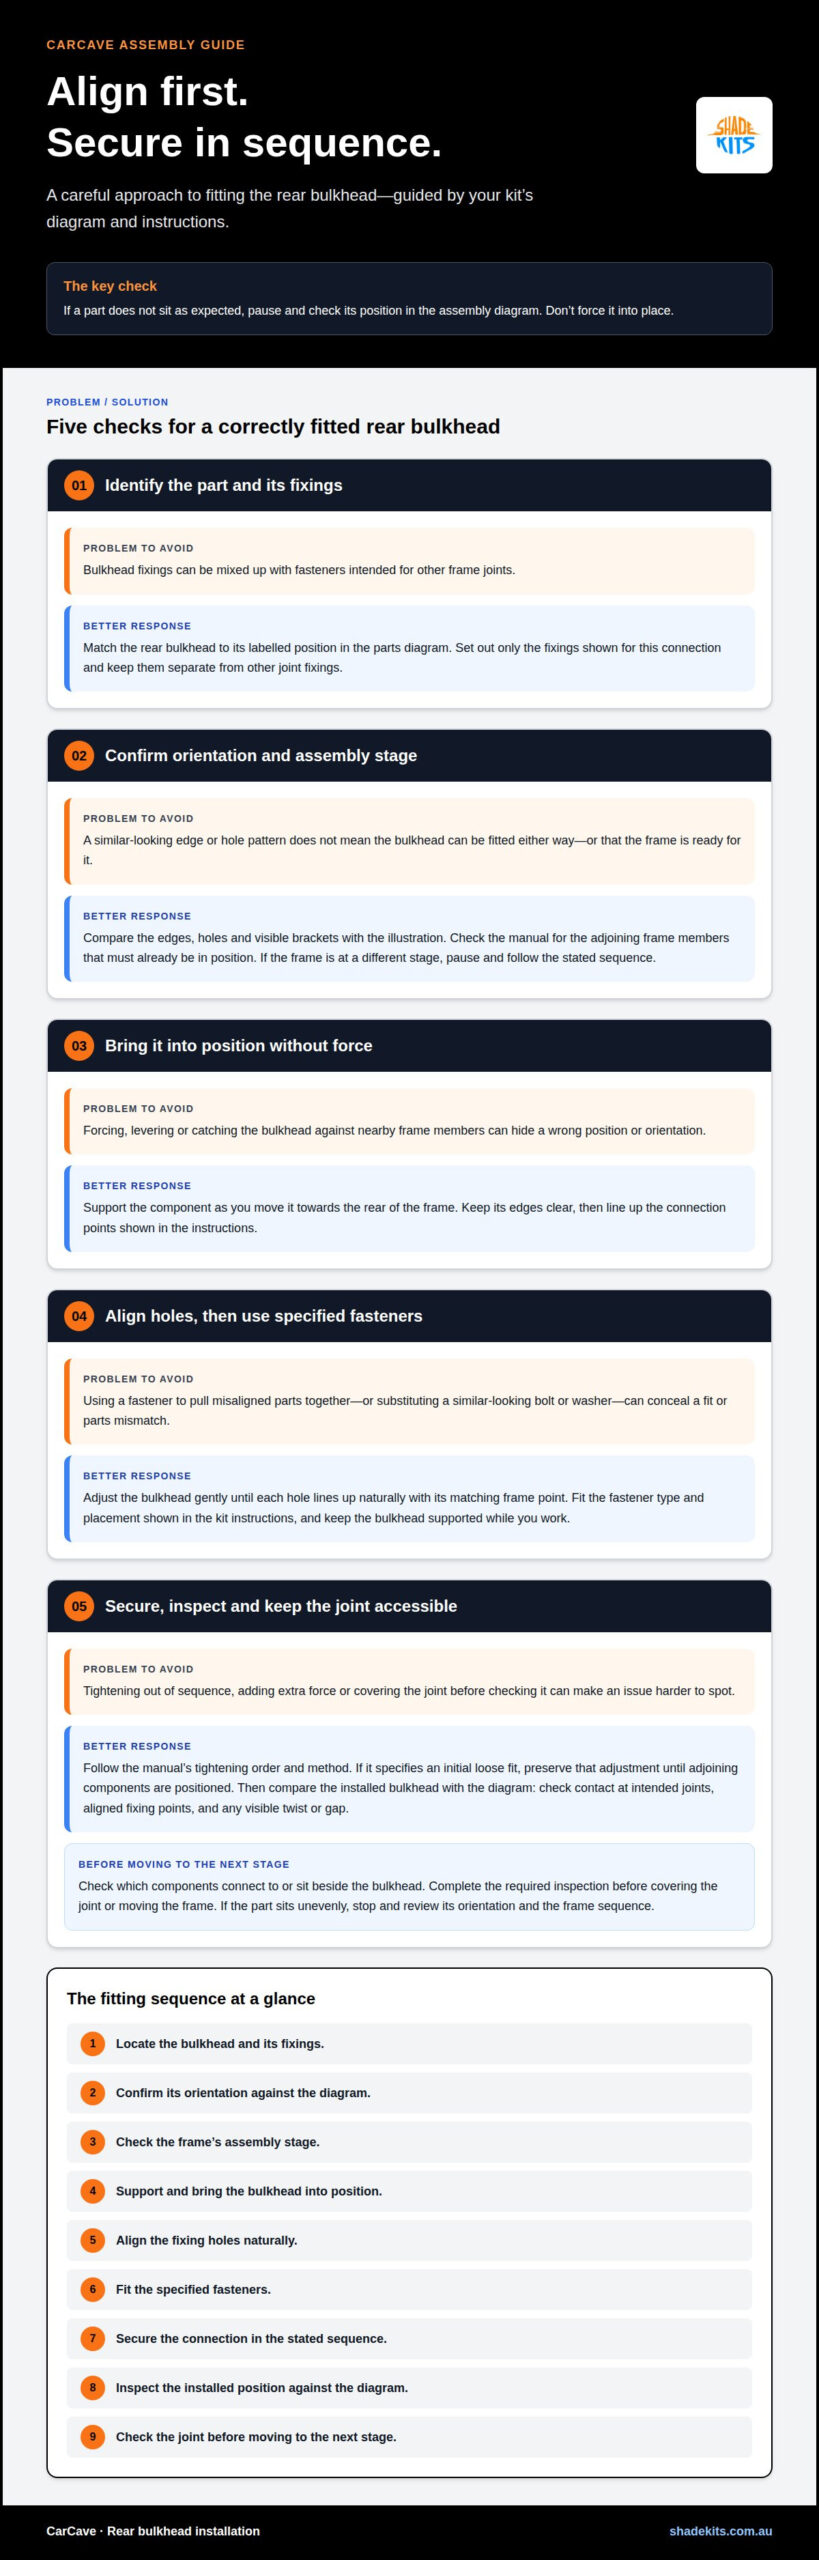
Use the assembly diagram supplied with your kit to identify the rear bulkhead, its orientation and its fixing points. Position it carefully, and follow the specified sequence and fasteners in your kit instructions.
- Locate the bulkhead and its fixings. Match the rear bulkhead to its labelled position in the parts diagram. Set out only the fasteners shown for this connection, keeping them separate from fixings for other frame joints. This makes it easier to spot a misplaced or missing component before assembly proceeds.
- Confirm the correct orientation. Compare the bulkhead’s edges, holes and any visible brackets with the assembly illustration. Turn the part until those features correspond to the diagram. Don’t assume that a similar-looking edge or hole pattern means the component can be fitted either way.
- Check the frame’s assembly stage. Use the manual to confirm which adjoining frame members must already be in position. The bulkhead needs to meet those specified connection points. If the frame is at a different stage, pause and follow the stated sequence rather than rearranging components to make them fit.
- Bring the bulkhead into position. Support the component as you move it towards the rear of the frame. Keep its edges clear of nearby parts, then line up the connection points shown in the instructions. Controlled movement helps prevent the bulkhead catching on a member or being placed against the wrong side.
- Align the fixing holes. Compare each hole in the bulkhead with its matching point on the frame. Adjust the component gently until the holes line up naturally. Don’t lever the panel into position or use a fastener to pull misaligned parts together, as this can hide an incorrect orientation.
- Fit the specified fasteners. Use the fastener type and placement shown in the kit instructions. Start each connection as directed, keeping the bulkhead supported while you work. Don’t substitute a similar-looking bolt or washer; different fixing positions may require distinct parts from the supplied set.
- Secure the connection in sequence. Follow the manual’s tightening order and method for the rear bulkhead. If it specifies an initial loose fit before final tightening, preserve that adjustment until the adjoining components are positioned. Avoid adding extra force beyond the instruction’s stated method.
- Inspect the installed bulkhead. Compare the finished position with the assembly diagram. Look for consistent contact at the intended joints, aligned fixing points and any visible twist or gap. If the part sits unevenly, stop and review its orientation and the frame sequence before continuing.
- Keep the joint accessible for the next stage. Check the instructions for components that connect to or sit beside the rear bulkhead. Complete any required inspection before covering the joint or moving the frame. This keeps the fixing points visible and makes a missed connection easier to identify.
The parts and tools depend on your kit configuration. Use the supplied instructions to identify the components, quantities and tools you need. Check the parts list before starting rather than assuming every kit has the same fittings.
- Start with the assembly instructions. Lay out the manual before unpacking components. Find its parts list, tool requirements and assembly sequence. Check that the diagrams are readable and refer to the kit being assembled. Use the stated names and quantities to guide each later check.
- Match each component to the parts list. Unpack sections carefully and compare their labels or shapes with the manual. Separate structural members, panels, brackets and other identified parts. Keep similar-looking pieces apart until their positions are clear. This reduces mix-ups when several components share a similar profile.
- Sort the fasteners by type. Use the diagram or parts list to identify bolts, nuts, washers and other supplied fixings. Keep each type in a separate container, with its matching label or diagram reference nearby. Don’t combine similar fasteners: their appearance alone may not show which connection they suit.
- Gather only the specified tools. Check the manual’s tool list, then set those tools within reach. If the instructions call for a particular driver, spanner or measuring tool, use the stated type. Avoid substituting a tool simply because it seems similar. The correct fit helps prevent damage to fastener heads and components.
- Prepare a clear sorting area. Choose a stable, uncluttered surface for smaller fittings and paperwork. Keep longer structural parts grouped separately, with labels visible. Leave enough room to distinguish one assembly stage from the next. A clear layout makes it easier to return unused parts to their correct group.
- Protect and identify components. Keep parts on a clean surface while sorting, and avoid dragging finished faces across hard ground. Read any labels before removing them. Where a component’s orientation matters, use the manual’s illustration to identify its intended position before moving it into the assembly area.
- Check each assembly stage before starting. Review the next diagram and set out only the parts and fasteners shown for that connection. For example, keep rear bulkhead fixings separate from fittings assigned to another frame joint. This stage-by-stage approach makes missing or misplaced parts easier to notice early.
- Keep the parts list for a final check. As components are used, refer back to the manual rather than relying on memory. Before moving to another stage, confirm the listed parts for the current connection have been used as directed. Set aside unused items without assuming they are spare; later steps may need them.
How many people are recommended for CarCave assembly?
Follow the crew-size guidance in the assembly instructions for your kit. The number of people needed depends on the components and assembly sequence, so do not base your plans on another structure or project.
- Find the crew guidance first. Read the assembly instructions before arranging help. Look for any stated number of people or directions about supporting components. Follow that guidance for your kit, rather than treating a general estimate as a substitute for its assembly requirements.
- Identify tasks needing coordinated handling. Review each stage and note where one person must hold a component while another aligns or fastens it. For example, a frame connection may require steady support during positioning. Use the manual’s sequence to identify when coordinated assistance is needed.
- Match the people available to the work. Choose helpers who can follow the same instructions and communicate clearly. Agree on simple cues, such as “hold”, “lower” and “stop”, before moving a component. Clear directions help prevent different people from adjusting the structure in conflicting ways.
- Assign roles before lifting or positioning. Decide who will guide the component, who will support its opposite end, and who will handle the relevant fixings. Keep those roles clear until the component is stable and attached as directed. Avoid leaving a helper unsure where to stand or what to hold.
- Keep the assembly sequence visible. Have the manual open to the current diagram so the group can refer to the same step. Confirm the part’s orientation and connection points before anyone moves it. This avoids relying on memory or giving instructions from different stages of the process.
- Pause if the component cannot be controlled. Stop before positioning if the available helpers can’t hold the part steadily or follow the specified sequence. Reassess the task and arrange suitable assistance before continuing. Don’t compensate by forcing a connection or asking someone to hold an awkward position.
- Use the instructions at each change of stage. The number of people needed may differ between sorting small fixings and positioning larger components. Check the next diagram before changing roles. Keep the same clear communication when aligning frame members, fitting the rear bulkhead or moving to another assembly step.
- Keep helpers clear of unfinished connections. Before tightening a fixing, make sure everyone understands whether they should continue supporting the component or move away. Follow the manual’s directions for securing each joint. Don’t release support simply because a fastener has entered its hole.
- Review the next step together. Once a connection is complete, compare the assembly with the relevant diagram. Confirm which component comes next and whether the current support roles still suit the task. This short pause helps the group stay coordinated without inventing a different crew size.
How do I prepare the site and anchor a CarCave securely?
- Read the site and anchoring instructions first. Find the manual’s requirements for the intended surface and specified anchoring method. These details determine what preparation is suitable. Don’t select anchors from a generic guide or assume one fixing method suits every surface.
- Choose a clear assembly area. Remove loose objects from the footprint and the surrounding work space. Allow room to lay out components and move them into position. Check the route from the delivery or storage area, so parts won’t need to pass through an obstructed space.
- Inspect the ground across the full footprint. Look for uneven areas, soft patches, loose material or visible obstructions. Compare the surface with the manual’s requirements. A surface that varies across the structure can complicate positioning, so address any mismatch before assembly starts.
- Confirm the planned footprint. Use the dimensions and layout shown in the kit documentation. Mark the intended positions lightly, then compare them with the available space. Check that the structure can be placed as illustrated, without shifting the footprint to avoid an obstruction or unsuitable section of ground.
- Consider how water moves through the area. Observe the site during or after rain if practical. Note where water collects or runs across the proposed footprint. Keep site drainage in mind during placement, and don’t alter the specified layout to work around a problem without reassessing the location.
- Prepare the surface to match the manual. Follow the stated requirements for the foundation or base. Don’t add an improvised layer or assume a particular material is suitable. The anchoring method must suit both the kit instructions and the surface where each fixing will be installed.
- Identify each anchoring point. Use the assembly diagram to locate the designated points on the structure. Match those positions to the intended base before fitting anything. Don’t drill new holes, omit a fixing point or move an anchor simply because another position seems easier.
- Install the specified anchors in sequence. Follow the manual’s fixing type, placement and installation method. Keep the frame aligned as the connections are secured. Avoid substituting hardware or tightening a fixing in a way that pulls the structure out of position.
- Inspect the completed anchoring. Compare every installed fixing with the diagram and check that the structure remains in its intended position. Review the surrounding surface for movement or damage. If the site doesn’t meet the stated requirements, resolve that issue before using the structure.
How long does CarCave assembly usually take
Assembly time varies with the kit components, work sequence, site readiness and available helpers. Allow time to check each connection, and plan around the steps in your kit instructions rather than relying on a general time estimate.
- Use the manual to map the work. Read the full assembly sequence and note each distinct stage. Separate preparation, frame assembly, bulkhead installation, anchoring and final checks in your plan. The manual’s sequence gives you a more useful guide than estimating from one task alone.
- Account for site preparation. Include time to clear the footprint, assess the surface and prepare it according to the instructions. If the area needs further work, assembly cannot sensibly begin until that preparation is complete. Keep site readiness separate from the time spent putting components together.
- Set out components before starting. Allow for unpacking and sorting parts against the parts list. Identifying the correct fixings and components early helps avoid interruptions once a connection is underway. Missing or misplaced items can also change the sequence, so don’t treat unpacking as part of fastening alone.
- Plan for the specified crew. Follow the manual’s guidance about how many people should help with each task. Coordinated support may be needed to position some components, while other stages involve sorting or fastening. Organise helpers around those tasks instead of assuming every stage moves at the same pace.
- Allow time for alignment. Position frame members and adjoining components in the sequence shown. Aligning holes and checking orientation takes attention; rushing can lead to rework if a part has been fitted incorrectly. Treat careful fitting as part of assembly, not as an optional final tidy-up.
- Keep the rear bulkhead stage in your plan. Identify its position and fixings from the diagram before beginning that step. Its installation involves checking orientation, matching connection points and securing the joint as directed. Allow for those checks rather than counting only the time spent inserting fasteners.
- Include anchoring and final checks. Follow the instructions for the intended surface and anchoring method. Then compare the completed structure with the relevant diagrams. These steps form part of the overall project, even if the frame itself appears assembled.
- Build in pauses for review. At the end of each stage, compare the work with the manual before moving on. If a component doesn’t align, stop and review its position rather than forcing it. This may affect the schedule, but prevents an unexamined fitting error from carrying into later steps.
- Plan by milestones, not guesses. Track progress from site readiness through sorting, assembly, anchoring and inspection. For planning specific to your kit, review the CarCave kit details alongside its assembly instructions.
Shade Kits
Shade Kits can help you choose a shade structure that suits your property and project. If your plans extend beyond a CarCave, its range includes Carport Kits, Pergola Kits, Awning Kits and Patio Covers. The right option depends on how you want to use the outdoor area and the space available. Consider your intended layout and the type of cover you need before deciding what fits your plans. For guidance on choosing a suitable kit for your project, contact Shade Kits.
Plan your next outdoor project
Once assembly is complete, you can consider what would make your outdoor space work better. Start with the area you want to cover and how you plan to use it. Shade Kits offers Carport Kits, Pergola Kits and Awning Kits for different outdoor projects.
Keep your next decision practical: start with the space, the intended use and the type of cover that suits your plans. The CarCave assembly instructions can guide you through this build, while a separate project may call for a different shade solution. Shade Kits can help you explore the options available for that next project without turning this assembly guide into a one-size-fits-all recommendation.
Ready to talk through a shade structure for your space? Contact Shade Kits to discuss your plans. Take the next step when you’re ready, with a clear idea of what you want your outdoor area to do.
Frequently Asked Questions
Where can I find the official CarCave assembly instructions or manual?
Use the instructions supplied with your CarCave kit as your assembly guide. They show the parts, diagrams and sequence for your kit. Keep them nearby as you work, so you can check a component’s position against the correct diagram. If you need another copy or have a question about a step, Shade Kits’ support team can help with instructions.
What are the step-by-step CarCave assembly instructions?
Follow the kit-specific manual in order: prepare the site, identify the parts and tools, assemble the structure as illustrated, fit the bearings and rear bulkhead at their specified stages, then anchor and inspect the completed assembly. The diagrams determine the correct orientation and position of each component. Don’t substitute a different sequence or force parts to fit. These CarCave assembly instructions should guide each stage, including any checks required before moving on.
What should I do if parts are missing or damaged?
Check the components against the kit’s parts list and pause before proceeding if a required part is missing.
