
Why should a professional-looking shade solution require a professional’s price tag? If you’ve looked at custom-built quotes lately, you’ve likely noticed they’ve become increasingly out of reach for the average household. At the same time, nobody wants to settle for flimsy plastic alternatives that fade and crack after just one summer. Finding high-quality aluminium awning kits Australia wide shouldn’t feel like a compromise between your bank balance and your home’s long-term protection.
It’s completely normal to feel a bit hesitant about which brackets suit your specific wall type or whether a DIY kit can truly handle a heavy hailstorm. We’re here to demystify the process and help you take control of your home improvements. In this guide, you’ll learn how to choose, plan, and install a durable outdoor solution that blocks 99% of UV rays while saving you thousands via factory-direct sourcing. We will walk you through the technical essentials for 2026, from navigating local council exemptions to ensuring your installation meets the latest Australian wind standards. It’s time to achieve that sleek, minimalist look without the middleman markups.
Many homeowners are looking for ways to cut energy bills while protecting their property from the elements. If you’re wondering what is an awning? at its most basic level, it’s a secondary covering attached to an exterior wall. However, modern aluminium awning kits Australia wide have evolved far beyond simple canvas flaps. These kits arrive as a complete, flat-packed system designed for straightforward assembly, containing everything from the structural brackets to the weather-resistant roofing panels. It’s a professional-grade solution delivered directly to your door.
We’re seeing a massive shift away from traditional timber and fabric. Timber requires constant sanding and painting to prevent rot, while fabric often succumbs to mould and fading within a few seasons of harsh UV exposure. Aluminium kits offer a “set and forget” alternative that stays looking new for years. They aren’t just for windows; these structures are increasingly used to protect expensive air conditioning units from direct sun, which helps them run more efficiently. They also provide vital shelter over doorways, ensuring you don’t get drenched while fumbling for your keys during a downpour.
A high-quality kit is a precision-engineered system. It’s designed so that every part fits together without the need for specialised trade tools. Here is what you can typically expect to find inside:
While a temporary gazebo might seem like a quick fix, it rarely survives a standard Australian storm. Permanent aluminium structures are engineered to meet strict wind actions standards, providing peace of mind when the weather turns nasty. Because they’re fixed directly to the building’s structure, they won’t blow away or collapse under pressure.
Beyond safety, a permanent fixture adds genuine kerb appeal. A cohesive design that matches your home’s architecture suggests a level of quality that temporary solutions simply can’t match. It’s a simple weekend project that adds immediate property value without the ongoing maintenance headache of painting or fabric repairs. You get the custom look of a professional install at a fraction of the cost.
Selecting the right materials for your home’s exterior is a decision that impacts both longevity and daily comfort. In the Australian climate, the combination of powder-coated aluminium and UV-resistant polycarbonate has emerged as the gold standard. While traditional materials like timber or fabric struggle with the intense sun, aluminium awning kits Australia wide provide a structural solution that actually lowers your energy bills. External shading can be up to three times more effective than internal blinds at stopping heat from entering a home, significantly reducing your reliance on air conditioning during the peak of summer.
High-quality kits offer 99% UV blockage, protecting your carpets and furniture from fading while still allowing natural light to filter through. This balance is difficult to achieve with opaque materials, making this duo the preferred choice for modern renovations. If you are ready to upgrade your home’s exterior, you can explore the range of durable awning kits designed specifically for these conditions.
Aluminium is naturally corrosion-resistant, which is a vital feature for homes in coastal areas where salt spray can destroy steel in a matter of months. Modern kits use advanced powder-coating techniques to ensure long-term colour retention and an extra layer of protection against the elements. This material is prized for its exceptional weight-to-strength ratio. It is light enough for a safe DIY wall mounting process but strong enough to meet the structural requirements outlined in the National Construction Code.
As we move through 2026, sustainability has become a priority for many homeowners. Aluminium is almost infinitely recyclable, making it an environmentally responsible choice for permanent outdoor structures. It won’t warp like timber or tear like fabric, ensuring your investment remains intact for decades without needing chemical treatments or frequent replacements.
When comparing roofing options, polycarbonate offers clear advantages over glass. It is significantly lighter, making installation much safer for a solo DIYer, and it provides superior impact resistance. This is crucial during the Australian hail season. While glass can shatter, polycarbonate is engineered to absorb the energy of a hailstone without cracking. These panels also come with built-in tinting options to suit your specific needs:
Engineered kits also account for the physical realities of our climate. Polycarbonate panels are installed with specific gaskets and fixings that allow for natural expansion and contraction. This ensures the structure remains leak-free even when temperatures swing from a frosty morning to a scorching afternoon.
Once you understand the durability of the materials, the next step is selecting the specific configuration that suits your home. Choosing aluminium awning kits Australia wide requires a bit of planning to ensure the final result looks like it was part of the original build. Most homeowners start by looking at a single window or door, but the modular nature of modern kits allows for much greater flexibility. If you have a large patio or a long walkway, you can join multiple kits together using specialised joining bars to create a seamless run of protection. This modular approach is often more manageable for a DIYer than trying to hoist a single, massive structure into place.
Beyond the physical footprint, your choice of kit should also consider the local environment. A well-placed awning can reduce UV exposure by up to 75%, making your outdoor spaces significantly safer for the whole family. Whether you are aiming to cool down a bedroom that gets the afternoon sun or simply want a dry spot to leave your boots by the back door, the right kit configuration makes all the difference.
Getting your measurements right is the most important part of the planning phase. You need to calculate both the width and the projection, which is how far the awning extends from the wall. As a general rule, your awning should be at least 200mm to 300mm wider than the window or door frame to prevent rain from blowing in at the sides.
Don’t forget to check your clearances. For doors that swing outwards, ensure the awning is mounted high enough so the door doesn’t strike the frame. You also need to account for the “fall” or the pitch of the roof. A slight angle is essential for water runoff; without it, rain can pool on the panels and cause unnecessary stress on the brackets. Most kits are designed with a pre-set angle, so check that you have enough vertical wall space above your opening to accommodate the bracket height.
Modern kits are designed to be as visually appealing as they are functional. Choosing a frame colour that complements your existing gutters, downpipes, or window trims will create a cohesive look. Black and charcoal are currently popular for contemporary homes, while white or silver often suits more traditional or coastal architectures. You can browse our range of aluminium awnings to see how different frame and panel combinations can transform a facade.
The tint of your polycarbonate panels also plays a role in your home’s interior lighting. A clear panel will keep your indoor rooms bright but offers less heat reduction. Conversely, a grey or bronze tint provides a cooler, shaded feel indoors, which is often preferred for west-facing windows that bear the brunt of the summer heat. By matching the tint to your specific cooling needs, you create a more comfortable living environment year-round.
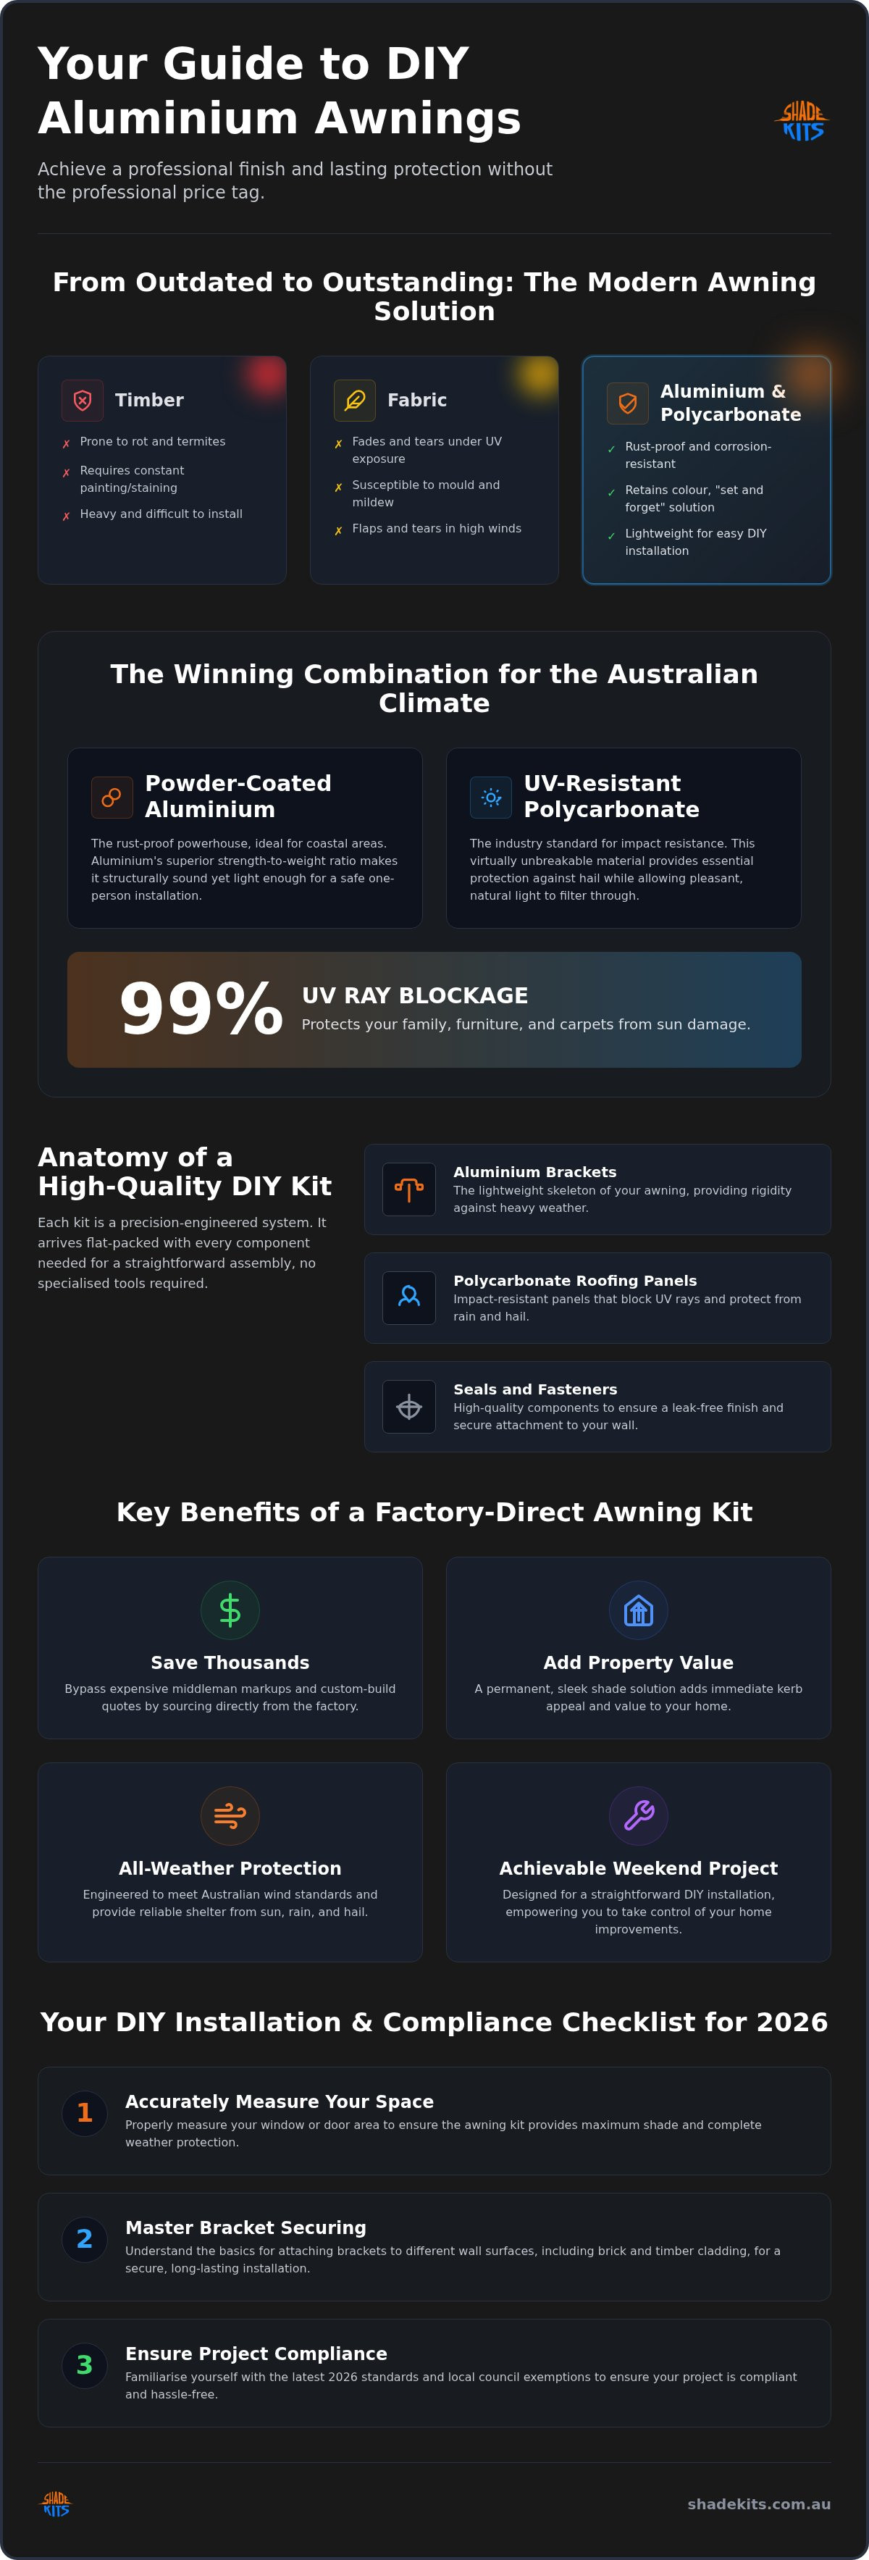
Installing aluminium awning kits Australia wide is a straightforward weekend project once you have your measurements sorted. While professional installation for these types of structures can cost between $75 and $100 per hour, you can achieve a professional result yourself with basic household tools. You will need a power drill with masonry or timber bits, a spirit level, a ladder, and a high-quality silicone gun. Having a second pair of hands is helpful when lifting the frame into position, but the lightweight nature of aluminium makes the process manageable for most homeowners.
Before you begin, organise your workspace and verify that all components from the kit are present. It is much easier to identify a missing fastener while the ladder is still in the garage than halfway through the install. If you are ready to begin your home improvement journey, you can browse our range of DIY awning kits to find the perfect fit for your space.
Success starts with choosing the right fasteners for your specific wall type. If you are mounting to solid brick or concrete, expansion anchors like DynaBolts provide the necessary grip to handle wind loads. For homes with timber cladding, it is vital to locate the internal studs and use heavy-duty coach screws; simply anchoring into the thin cladding will not provide enough structural integrity. If your wall is rendered, take care to measure the depth of the render so your fasteners reach the solid substrate behind it.
Once your brackets are secured, the module assembly follows a logical sequence. Start by slotting the UV-resistant polycarbonate panels into the aluminium frame channels. These panels should fit snugly. They are designed to slide into place with minimal resistance, so avoid using excessive force. Secure the support bars according to the kit instructions, ensuring all bolts are tightened firmly to create a rigid structure.
The final step is often the most overlooked but remains essential for a long-lasting finish. Applying a bead of weather-rated silicone along the top edge where the awning meets the wall prevents water ingress. This ensures that rain runs over the top of the awning rather than trickling down your facade and behind the structure. Once the sealant is dry, your installation is complete and ready to provide years of maintenance-free protection.
Choosing to upgrade your home’s exterior is a significant decision. When searching for aluminium awning kits Australia wide, it is easy to get lost in a sea of generic options. Shade Kits stands out by focusing on three core pillars: durability, simplicity, and direct value. We believe that high-quality outdoor protection should be accessible to every homeowner, not just those with a massive renovation budget. By focusing on a factory-direct model, we ensure that you receive premium materials without the inflated price tags often found in retail showrooms.
Cheap plastic or fabric alternatives might save a few dollars upfront, but they frequently require replacement after just one or two summers. A Shade Kit is designed to be a permanent fixture. By choosing materials that resist rust and impact, you are avoiding the cycle of waste and repeat spending. This pragmatic approach to home improvement is why so many Australians trust us to protect their most valuable assets. It is a long-term investment that adds genuine functionality and kerb appeal to your property.
Our model is built on transparency. By removing the traditional retail middleman, we ensure that every dollar you spend goes directly into the quality of the components. You aren’t paying for showroom rent or sales commissions; you are paying for structural-grade aluminium and UV-stabilised roofing. This specialist focus allows us to refine our designs specifically for local conditions. The same attention to detail found in our awnings is also present in our CarCave range, providing specialised protection for your vehicles with the same ease of installation.
We take the stress out of logistics and implementation. Our national delivery network is designed to transport large, flat-packed kits safely to your doorstep, regardless of where you live. Each kit is packed with care to ensure the powder-coated finishes remain pristine during transit. Once your kit arrives, you aren’t left to figure it out alone. We provide more than just the physical parts; we offer the expert guidance needed to ensure your project is a success.
Our support team understands the nuances of Australian building surfaces and is available to provide technical reassurance. If you want to dive deeper into design trends or technical specifications, our 2026 Guide to Aluminium Awnings offers additional tips for modern homes. We move at your pace, providing the resources you need for a professional-looking result. Ready to secure your home against the elements? Start your home improvement project today with a Shade Kit.
Investing in your home’s exterior doesn’t have to be a complicated or overpriced endeavour. By choosing aluminium awning kits Australia wide, you are selecting a solution engineered specifically for our unique environmental challenges. As we have explored, the combination of powder-coated aluminium and UV-resistant polycarbonate provides a level of protection that timber and fabric simply cannot match. This isn’t just about shade; it is about building long-term resilience against hail, storms, and the intense summer sun while adding immediate property value.
Taking the DIY route allows you to achieve a professional-grade finish without the traditional markups. Our factory-direct pricing removes the middleman, ensuring you get the best possible value delivered safely via our national network. Whether you are protecting a single window or joining multiple modules for a larger patio, the process is designed to be straightforward and rewarding. It is time to transform your outdoor space into a comfortable, protected retreat. Shop our range of DIY Aluminium Awning Kits today and take the first step toward a more resilient home.
Whether you need council approval depends on the size of the structure and how it is attached to your home. In many Australian states, small window awnings under 10 square metres and 2.4 metres high are considered exempt development and don’t require approval. However, most structures attached to a house require building approval to ensure safety. It’s best to check with your local council’s specific planning guidelines for 2026.
Yes, you can install an aluminium awning kit on a rendered wall provided you anchor the brackets into the solid substrate behind the render. It’s vital to measure the depth of the render and use fasteners long enough to reach the brickwork or timber studs. This ensures the structure can handle wind loads and the weight of the frame. Using high-quality masonry anchors is essential for a secure installation.
Maintaining your polycarbonate panels is straightforward and requires minimal effort. You should clean them every few months using a soft sponge or cloth with mild soapy water to remove dust and salt spray. Avoid using abrasive brushes or harsh chemical cleaners, as these can scratch the surface or damage the UV-protective coating. A simple rinse with a garden hose afterward will keep your awning looking professional for years.
Our aluminium awning kits Australia wide are engineered specifically to withstand the harsh local climate, including heavy hail. Polycarbonate roofing is significantly more impact-resistant than glass or acrylic, making it virtually unbreakable under standard weather conditions. These kits are designed to absorb the energy of hailstones without cracking or shattering, providing reliable protection for your windows during the unpredictable Australian storm season.
Yes, the modular design of these kits allows you to join multiple units together to cover wider spaces like long patios or walkways. You can use specialised joining bars to create a seamless run of protection that looks like a single, custom-built structure. This approach is often easier for DIYers to manage than installing one very large, heavy unit. It provides a flexible way to scale your outdoor shade solution as your needs change.
You only need basic household tools to complete a standard DIY installation. Ensure you have a power drill with bits suited for your wall type, a spirit level for accuracy, and a sturdy ladder. A silicone gun is also necessary for applying weather-rated sealant against the wall. Having a set of wrenches or a socket set will help you tighten the support bars and frame components securely for a structurally sound finish.
Aluminium awnings with polycarbonate roofing are designed to block heat and UV rays without sacrificing natural light. While they reduce glare and lower indoor temperatures, the panels allow light to filter through to your living spaces. You can choose different tint options, such as clear, bronze, or grey, to control exactly how much light enters your home. Clear panels maximise brightness, while tinted options offer a cooler, more shaded feel indoors.
A standard DIY awning installation typically takes between two and four hours to complete for a single module. This timeframe includes the time needed to measure your mounting points, drill the holes, and assemble the frame. If you are joining multiple kits or working on a more complex surface like timber cladding, it might take a full half-day. Having a second person to help lift the frame into place can significantly speed up the process.